LCD and Shopping
LCD mod can make the screen draw way less power, one person claims it more than halved theirs... Worth a try! Read this and this for advice.
Did a couple current measurements with regular screen vs unplugging the top Backlight connector:
Total: Backlight=1.3-1.6A; No Backlight= 900mA
Screen: Backlight=600-900mA; No Backlight= 260mA
3.3Vin: Backlight= 600mA; No Backlight= 600mA
Board Battery: Backlight= 46mA; No Backlight= 50mA
Board 3.3 Vout: Backlight= 1.3A; No Backlight= 1.3A
So you can clearly see that the screen is taking a ton of power so I'm gonna try the LED backlight mod to bring down the total current consumption to less than 1.2A so that I can charge while playing (or at least have the charger keep up).
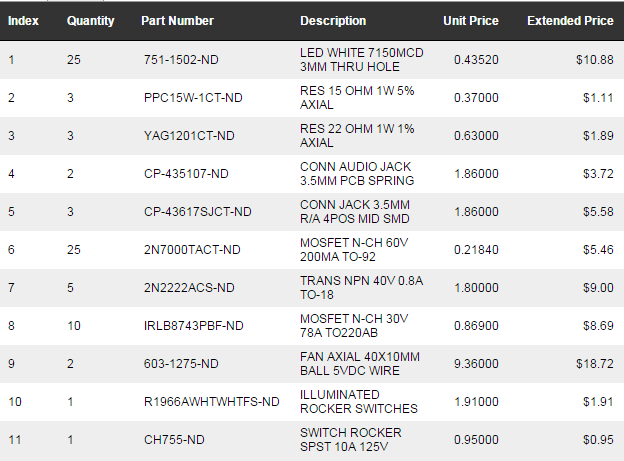
Bought a few things from Digikey:
LCD mod can make the screen draw way less power, one person claims it more than halved theirs... Worth a try! Read this and this for advice.
Did a couple current measurements with regular screen vs unplugging the top Backlight connector:
Total: Backlight=1.3-1.6A; No Backlight= 900mA
Screen: Backlight=600-900mA; No Backlight= 260mA
3.3Vin: Backlight= 600mA; No Backlight= 600mA
Board Battery: Backlight= 46mA; No Backlight= 50mA
Board 3.3 Vout: Backlight= 1.3A; No Backlight= 1.3A
So you can clearly see that the screen is taking a ton of power so I'm gonna try the LED backlight mod to bring down the total current consumption to less than 1.2A so that I can charge while playing (or at least have the charger keep up).
Bought a few things from Digikey:
Case and Buttons
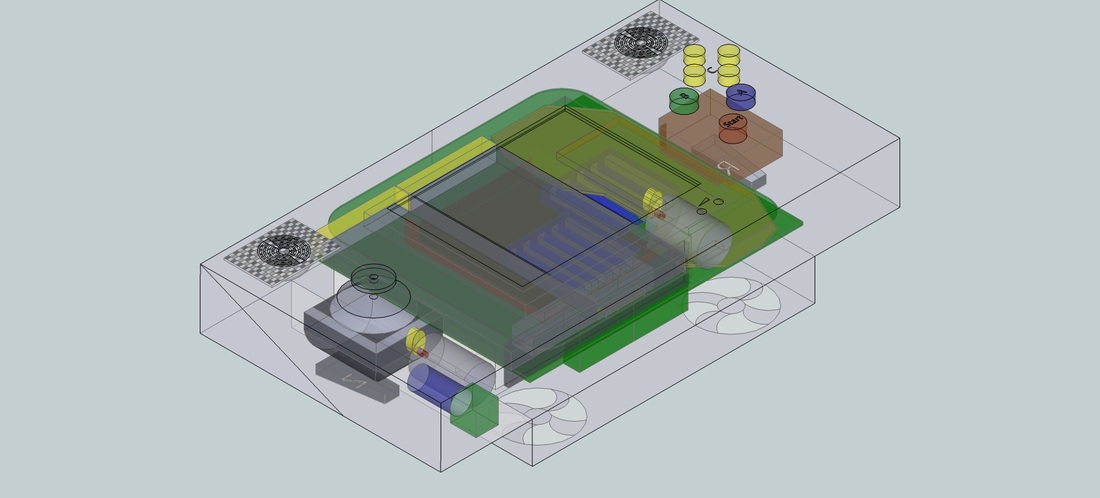
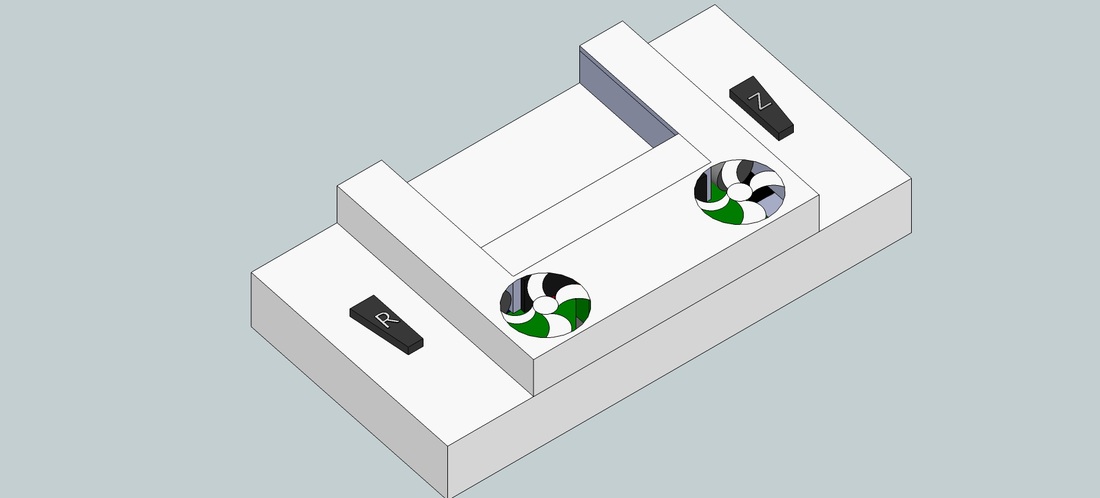
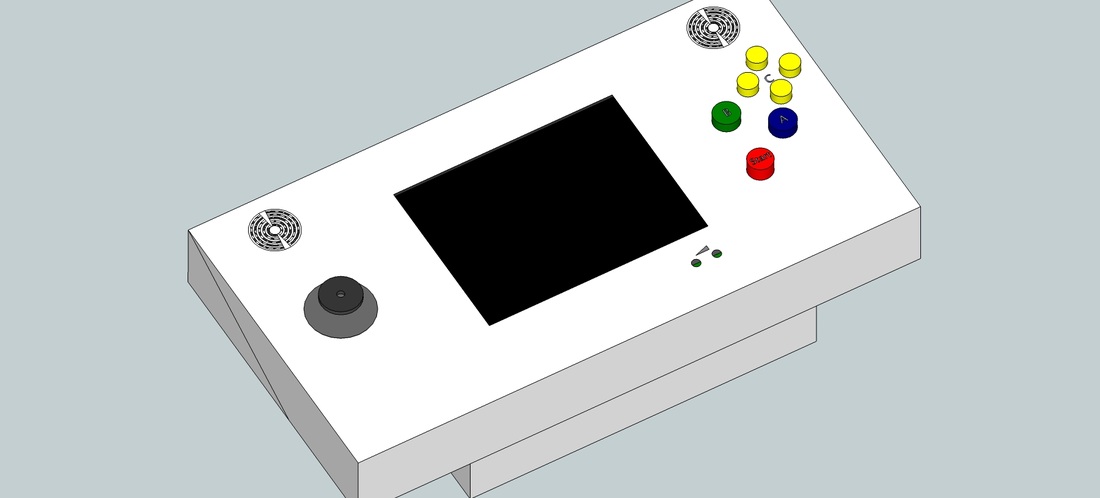
Been working on the case concept designs with Sketchup. After a while of consideration I went with the one you see in the gallery below. Seen from the bottom, its got a "T" shape to it. This is to keep the grips as thin as possible so your hands don't get tired while playing (did not want a giant square box). Also thought about making it a vertical design but realized that I would run out of room pretty fast and it might be top heavy. My current design makes it so that I the grips are only about 35mm wide while giving me enough room to fit the batteries, fans, and rumble pak motors in the console.
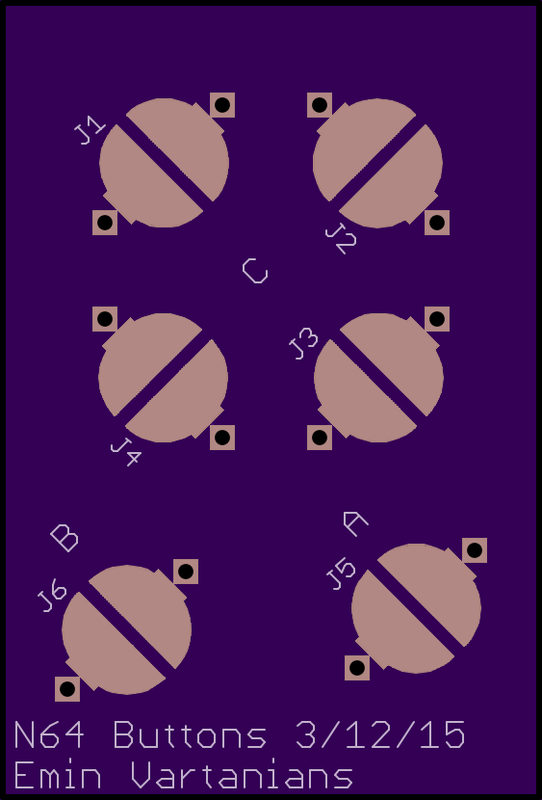
Gonna use the N64 controller A,B,C, and start buttons with the rubber pads. made my own PCB for the pads and got em at OSHpark.
Two fans in the back will ensure I had adequate airflow, not sure if I'll have the blowing in opposite directions yet. They are 5V but I'll be running them off the 3.3V supply for now. All the peripherals will be at the bottom of the console since there's ample room inside for them to stick out. Gonna hand this to Tamar (Girlfriend) to Cad up correctly with wall thicknesses so that we can be ready for laser cutting as soon as all electrical testing is done.
Been working on the case concept designs with Sketchup. After a while of consideration I went with the one you see in the gallery below. Seen from the bottom, its got a "T" shape to it. This is to keep the grips as thin as possible so your hands don't get tired while playing (did not want a giant square box). Also thought about making it a vertical design but realized that I would run out of room pretty fast and it might be top heavy. My current design makes it so that I the grips are only about 35mm wide while giving me enough room to fit the batteries, fans, and rumble pak motors in the console.
Gonna use the N64 controller A,B,C, and start buttons with the rubber pads. made my own PCB for the pads and got em at OSHpark.
Two fans in the back will ensure I had adequate airflow, not sure if I'll have the blowing in opposite directions yet. They are 5V but I'll be running them off the 3.3V supply for now. All the peripherals will be at the bottom of the console since there's ample room inside for them to stick out. Gonna hand this to Tamar (Girlfriend) to Cad up correctly with wall thicknesses so that we can be ready for laser cutting as soon as all electrical testing is done.
| dimensions.pdf |
Next Steps:
-Make schematic of everything
-Solder rumblepak to controller and test
-Verify I can run the motors together
-Carry out LCD backlight Mod
-Make schematic of everything
-Solder rumblepak to controller and test
-Verify I can run the motors together
-Carry out LCD backlight Mod
