PCB's
Spent a week or so doing PCB's. I used EagleCAD to make the schematics and Layout then used OSHpark to actually get the PCB's fabricated. They do it for really cheap and you can just submit the ".brd" file from Eagle. My electrical engineer brain is really embarrassed at the level of these designs but It gets the job done, sorry if they are hard to understand. The electronics are split into 4 PCB's.
Spent a week or so doing PCB's. I used EagleCAD to make the schematics and Layout then used OSHpark to actually get the PCB's fabricated. They do it for really cheap and you can just submit the ".brd" file from Eagle. My electrical engineer brain is really embarrassed at the level of these designs but It gets the job done, sorry if they are hard to understand. The electronics are split into 4 PCB's.
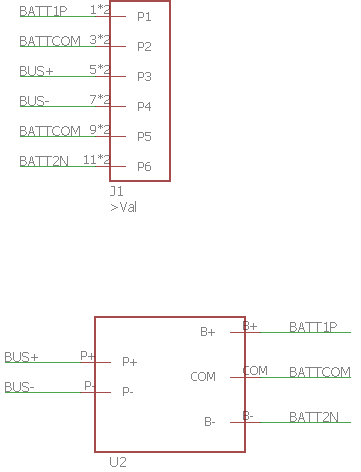
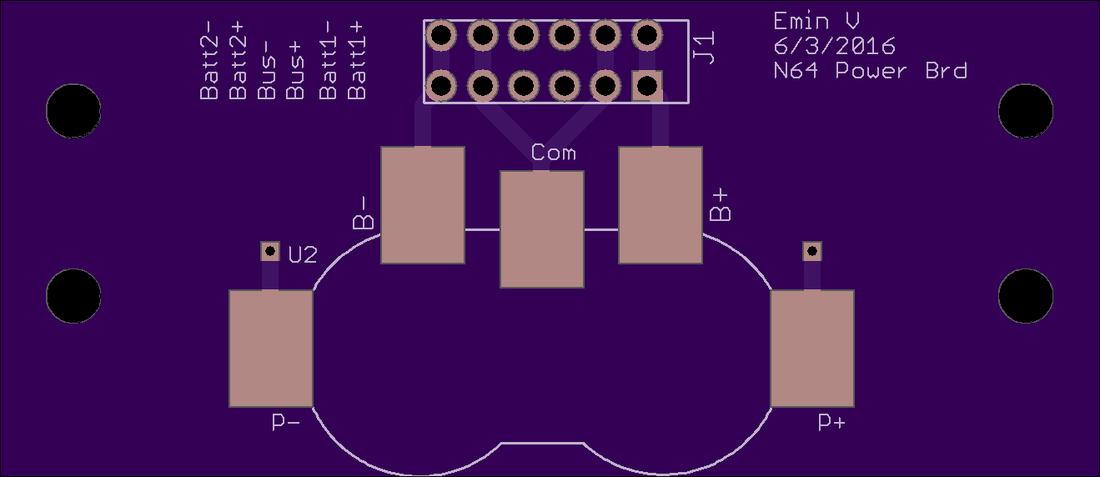
- Power PCB- takes in the Batteries and houses the protection circuit. It outputs Battery power (at nominal 7.2v)
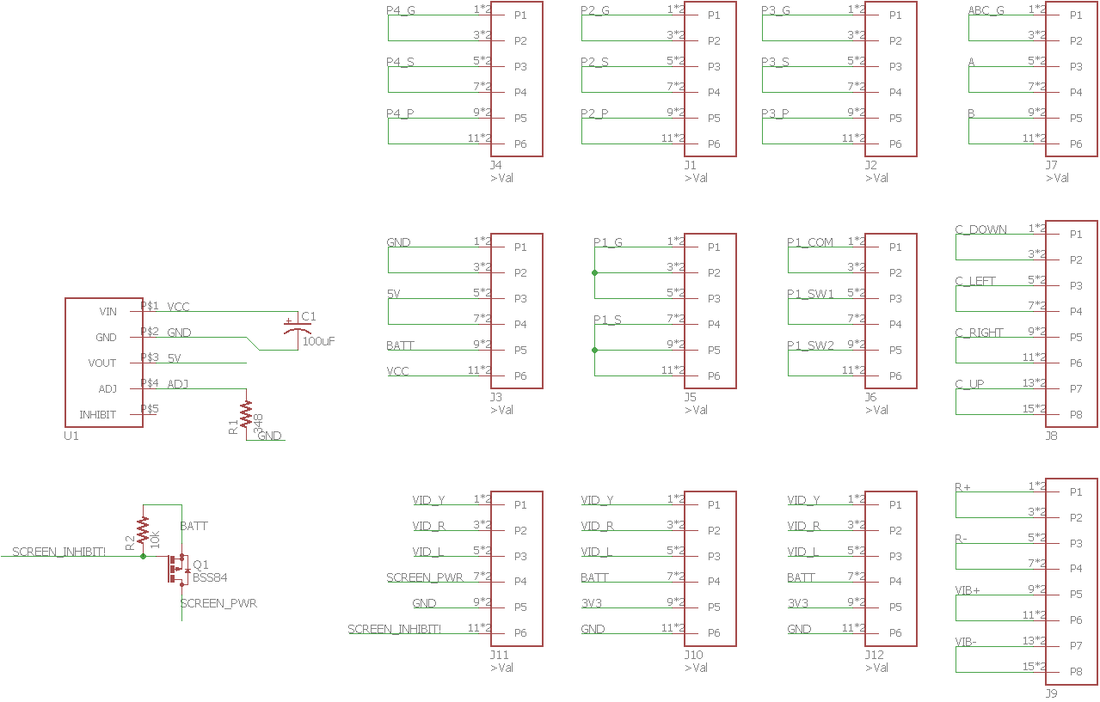
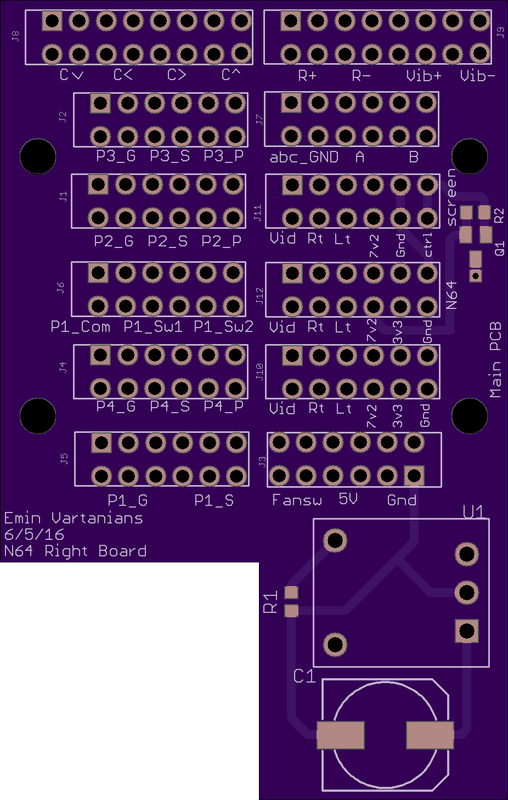
- Right PCB - This Board has the most connectors. It's also got a 5V regulator which powers the fans. It connects the N64 and screen to the main board as well as houses all the controller ports.
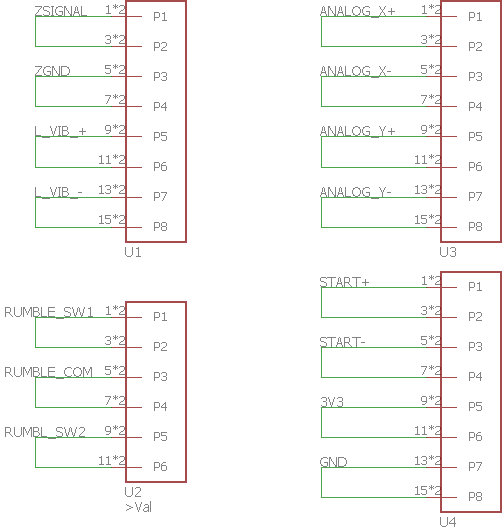
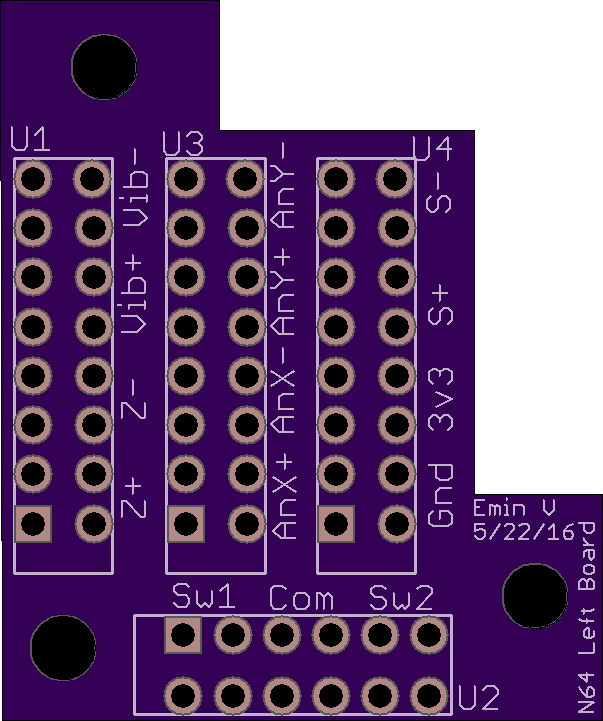
- Left PCB - This board is simple, it's only got 4 connectors which are just jumpered connections.
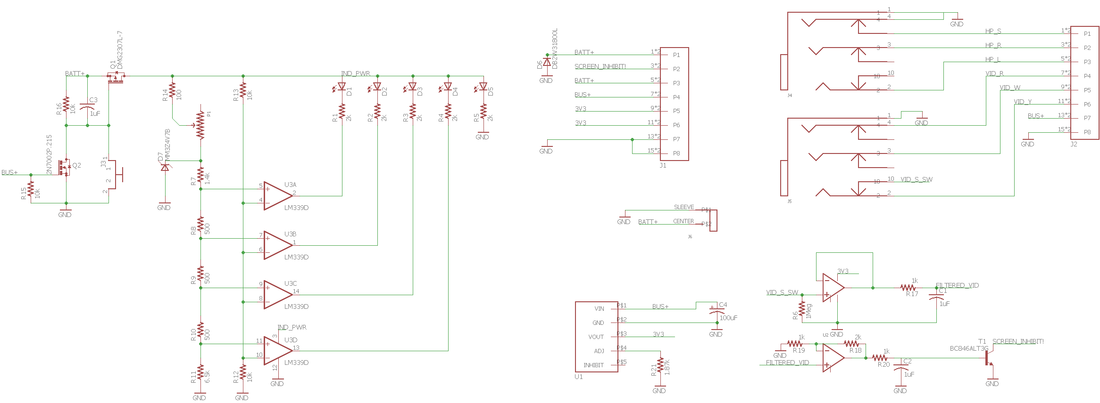
- Main PCB - This board takes in the 7.2v from power PCB, distributes the bus power (downstream of the on/off switch), generates 3.3v and sends it to the left and right PCB's for the controller and N64, houses the A/V and audio jacks, battery indicator circuit, and charging port
I've also ordered parts on Digikey. I had some parts already in my scrap bag (like a rail to rail opamp for the video signal sensor). I hope I had enough patience to put together a final As-Built bill of materials at the end of the project because I've changed small things in the block diagram I posted last time as well. Once the parts come in I can hook everything up and slowly build up a flat version of the N64. Once I know everything works through the boards I'll integrate it into the case.

The Case
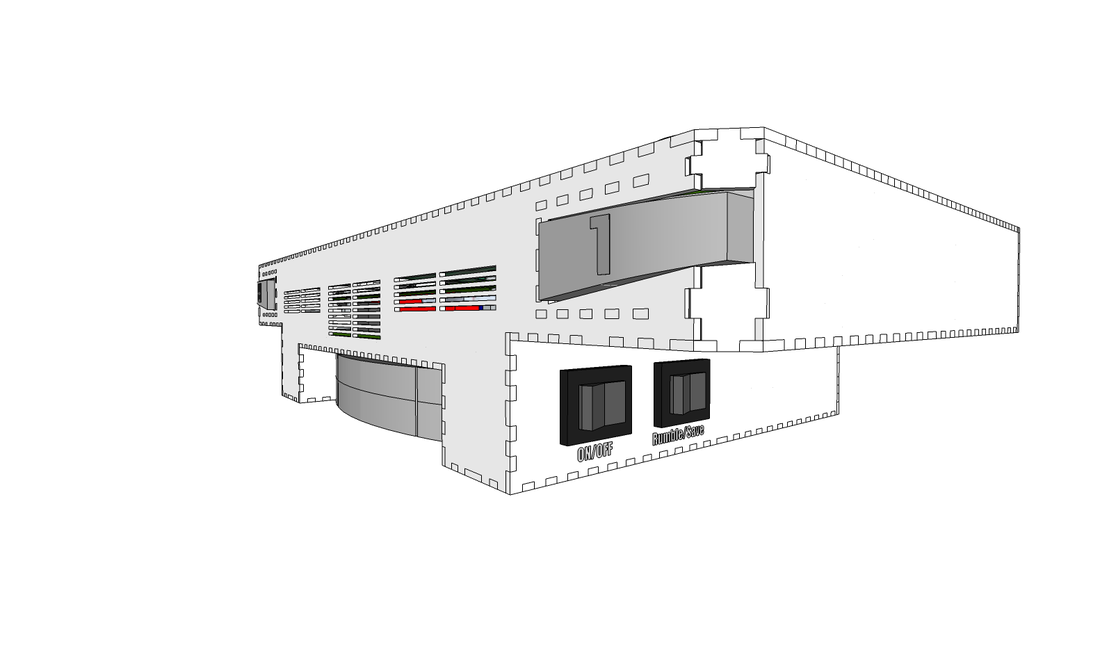
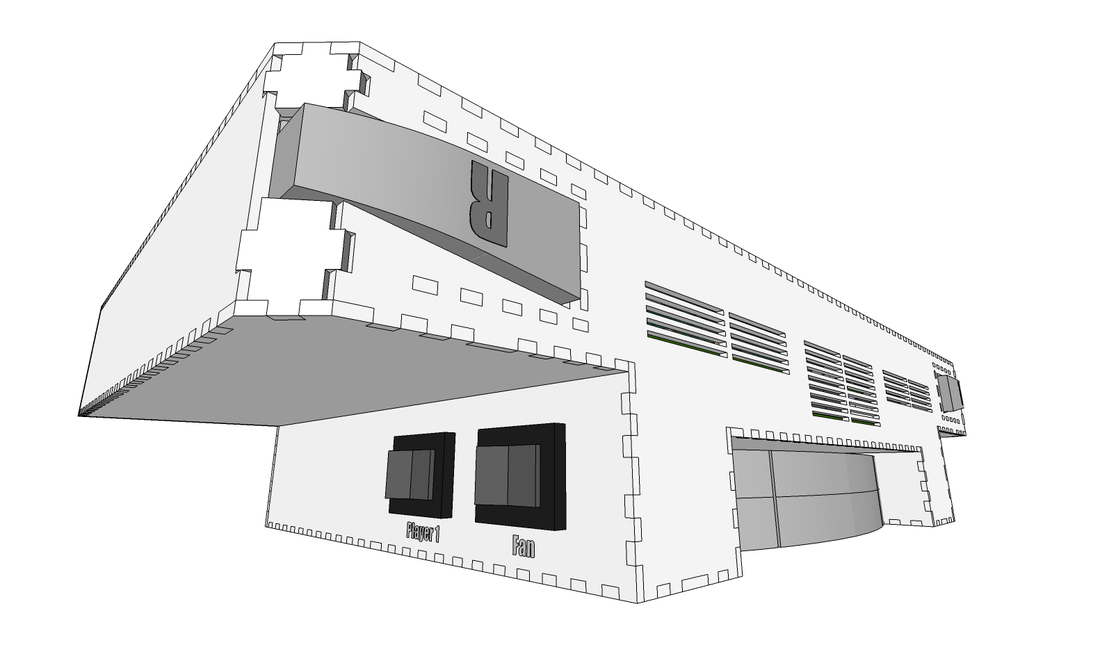
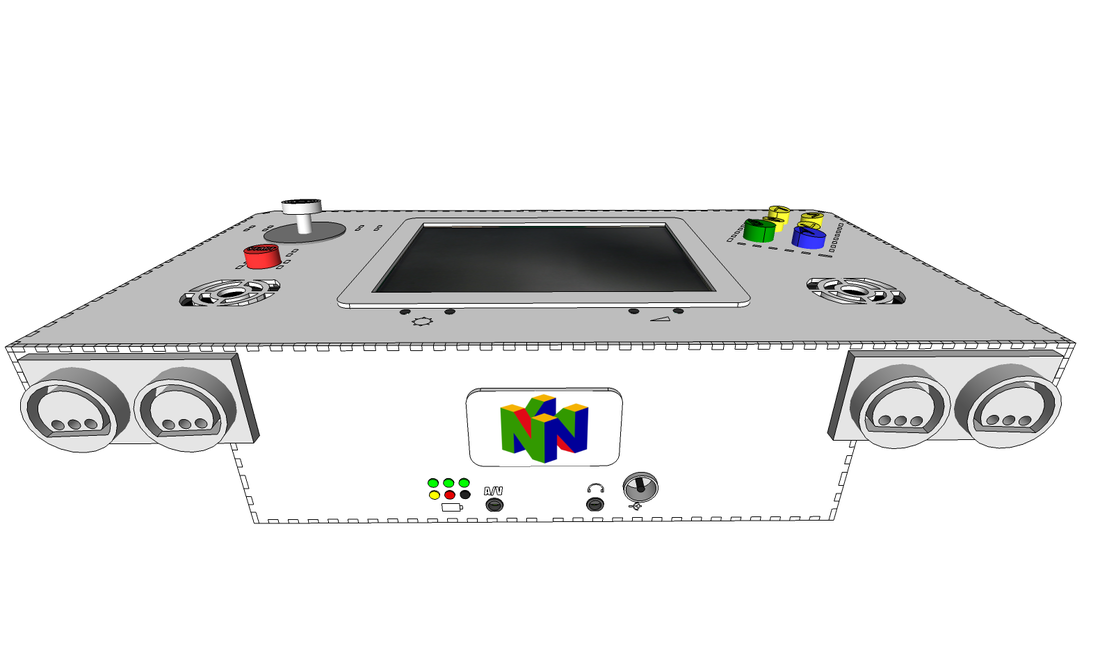
I added these 4 PCB's to the model, added air intake vents at the top and added little holes for controlling the screen. There's a little blemish at the bottom of the case since the N64 has a bracket on the inside which is not centered so I've temporarily places a small plaque that has the N64 logo on it. We'll see what I end up putting there. At this point the case is pretty much done. I'm gonna cut some a test piece of the bottom which will let me test the holes and controller ports. After that I'll be ready to cut all the parts as I wait for the PCB's and components to come in.
I added these 4 PCB's to the model, added air intake vents at the top and added little holes for controlling the screen. There's a little blemish at the bottom of the case since the N64 has a bracket on the inside which is not centered so I've temporarily places a small plaque that has the N64 logo on it. We'll see what I end up putting there. At this point the case is pretty much done. I'm gonna cut some a test piece of the bottom which will let me test the holes and controller ports. After that I'll be ready to cut all the parts as I wait for the PCB's and components to come in.

Next Steps
Gonna wait for the digikey parts and PCB's to come in, gotta order some nuts and bolts again based on the newest (and pretty much final) CAD model. Meanwhile I'll go back to cutting the case walls starting with the bottom face and try a couple attempts to etch decals into the acrylic as labels.
Gonna wait for the digikey parts and PCB's to come in, gotta order some nuts and bolts again based on the newest (and pretty much final) CAD model. Meanwhile I'll go back to cutting the case walls starting with the bottom face and try a couple attempts to etch decals into the acrylic as labels.
| N64_eagle_files.zip |
