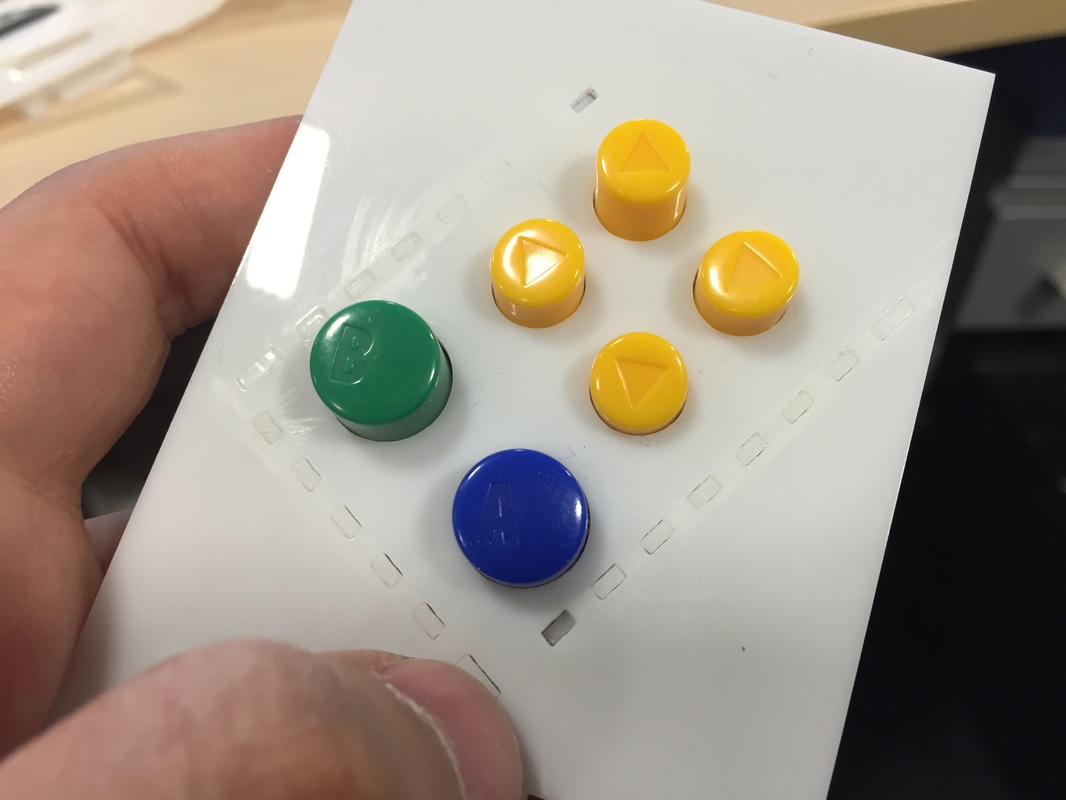
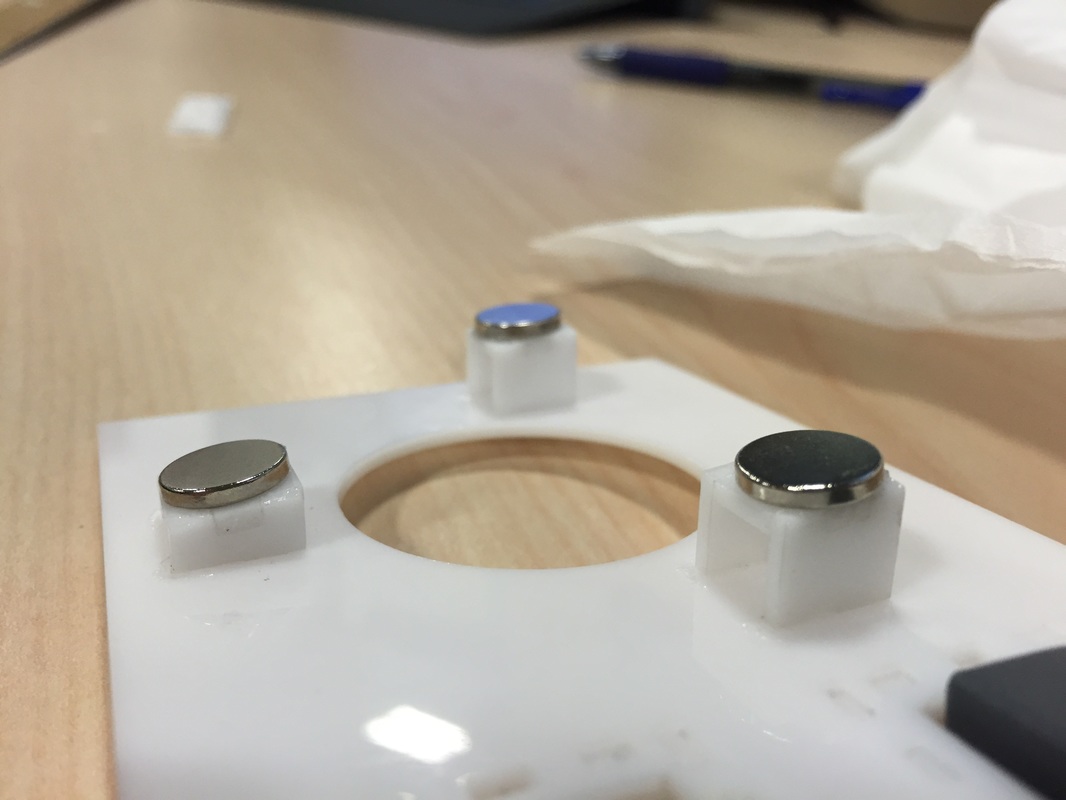
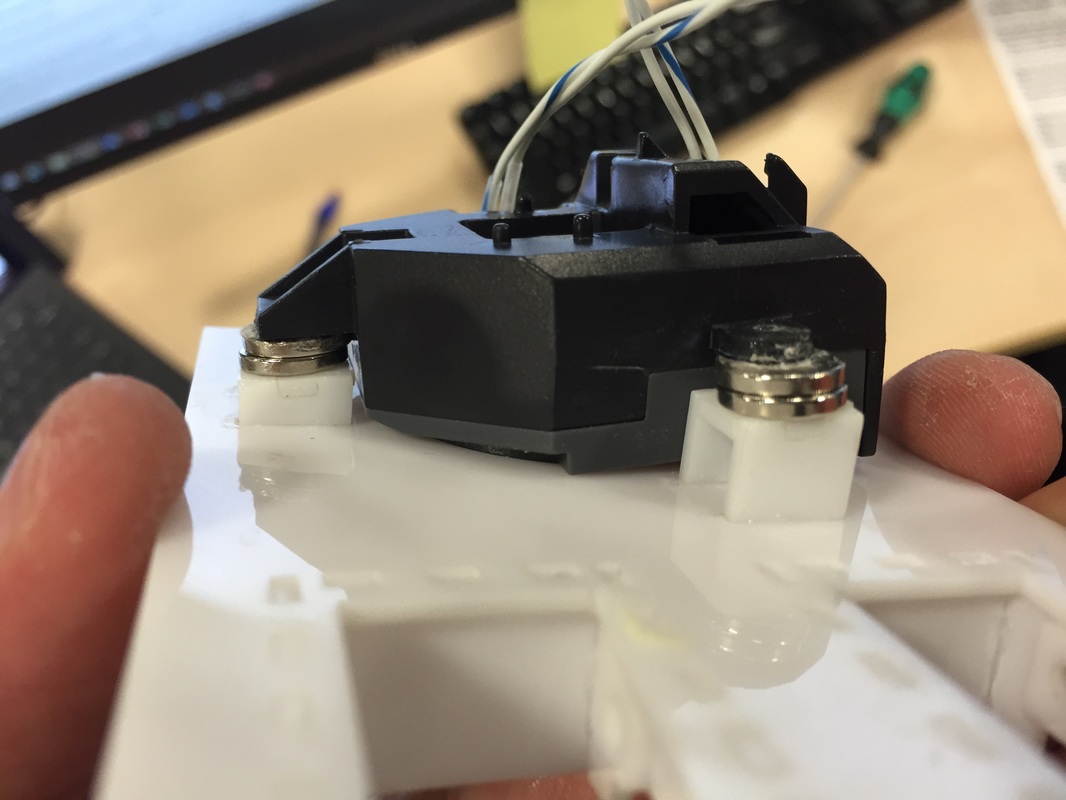
A,B and C buttons
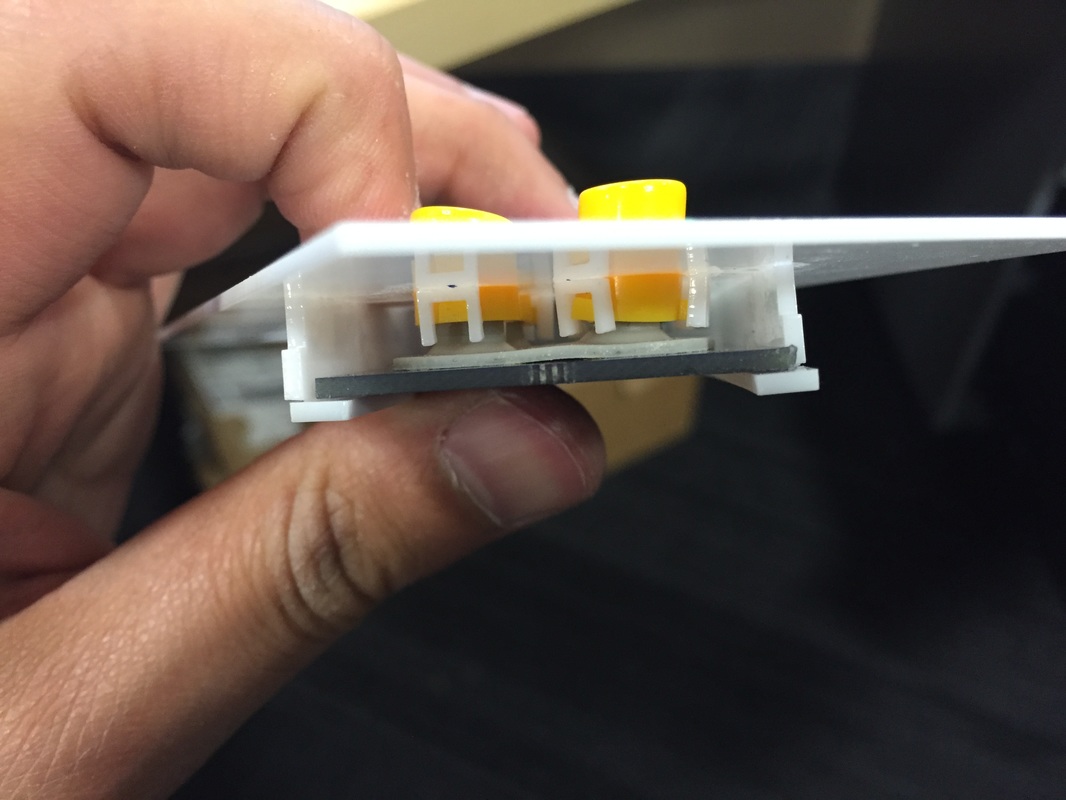
I'm getting pretty good at designing brackets now days. I iterated on the last revision by making the shelf shallower and adding pegs to keep the buttons from rotating. Also had a go at designing the R button and analog stick brackets but they didn't pan out in this one so had to separate them.
What's really nice about this ABC button design is that its completely serviceable, everything can be taken out, including the buttons, for replacement. See the end of this post for Google Sketchup models.
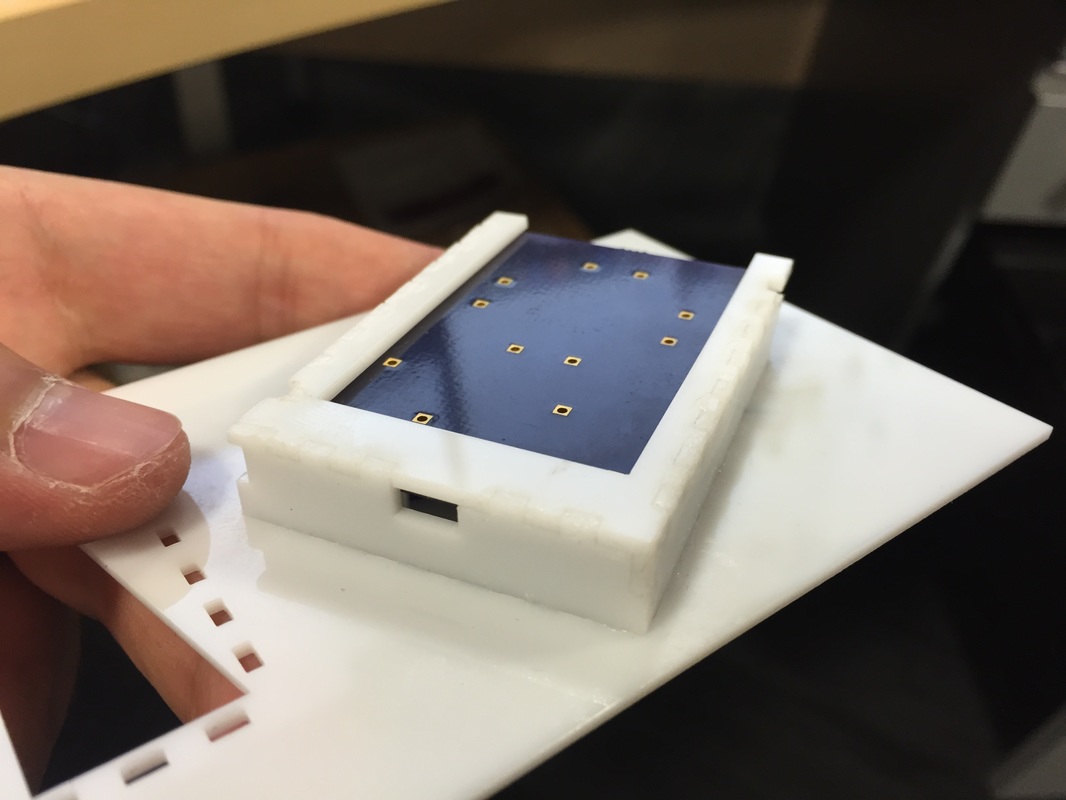

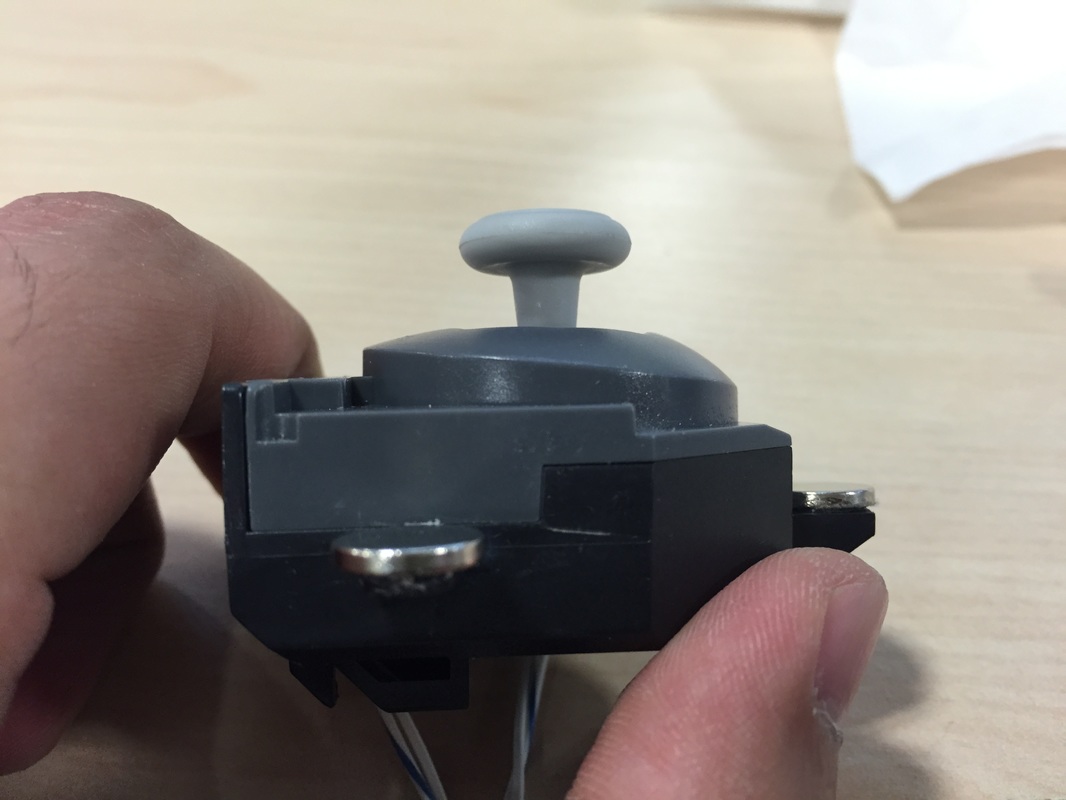
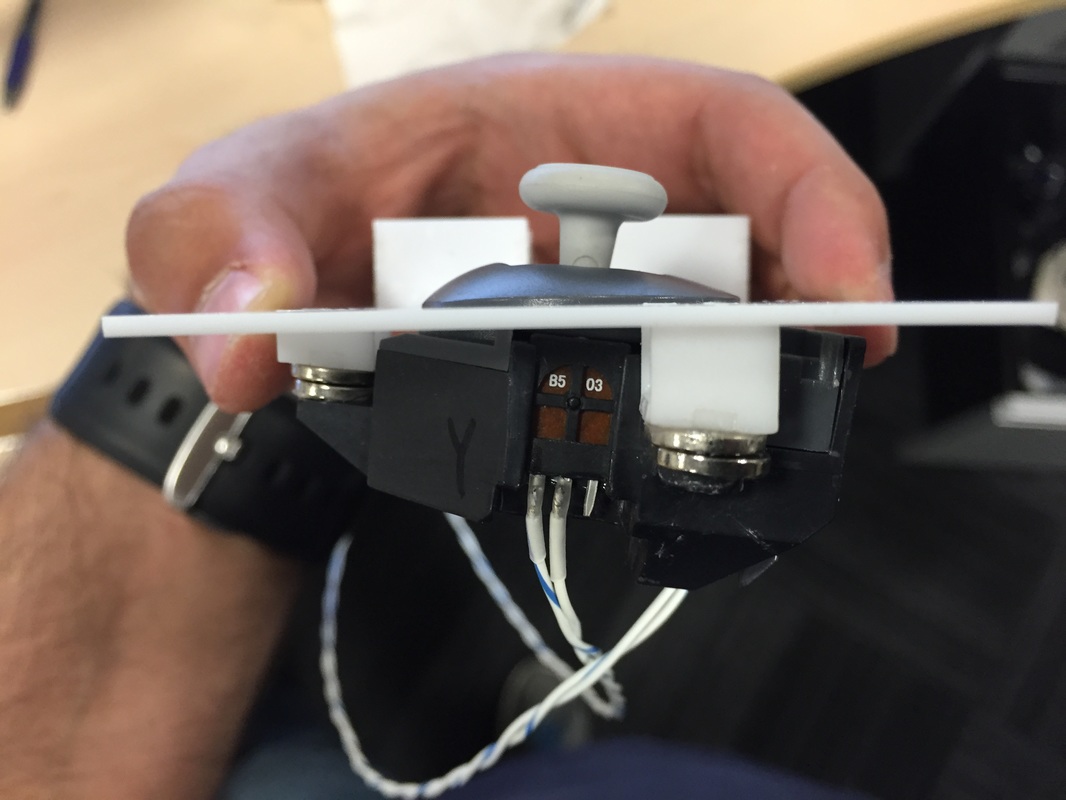
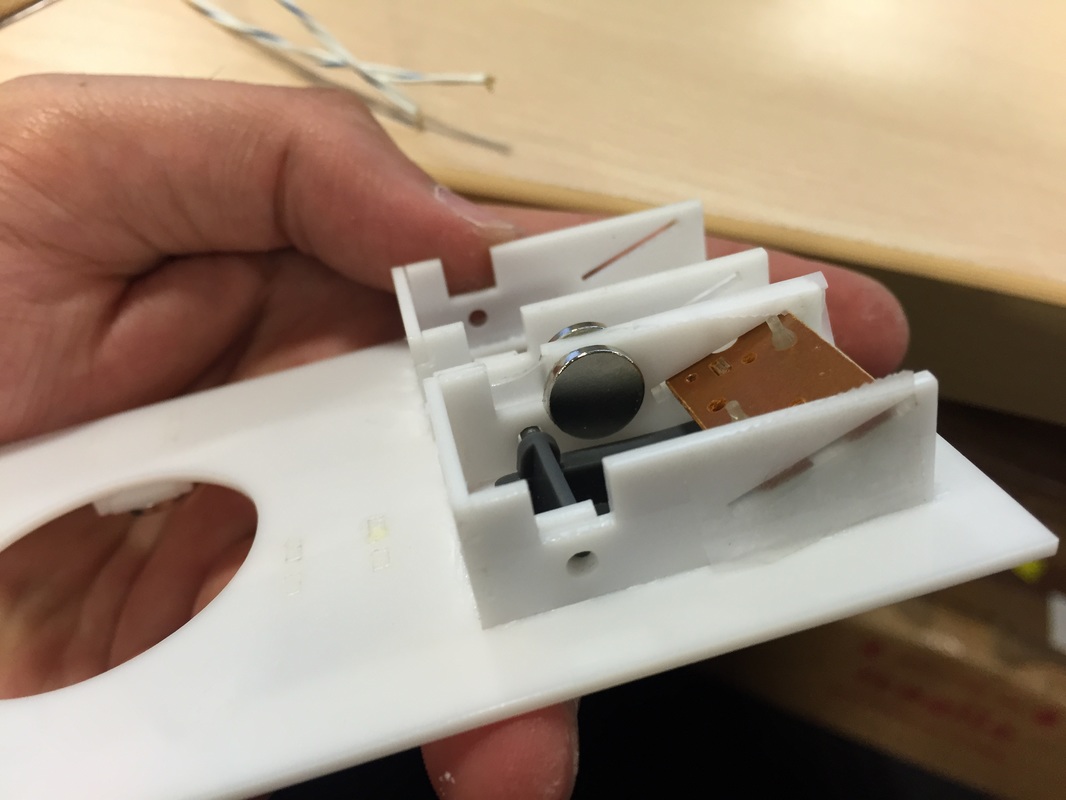
Analog Stick
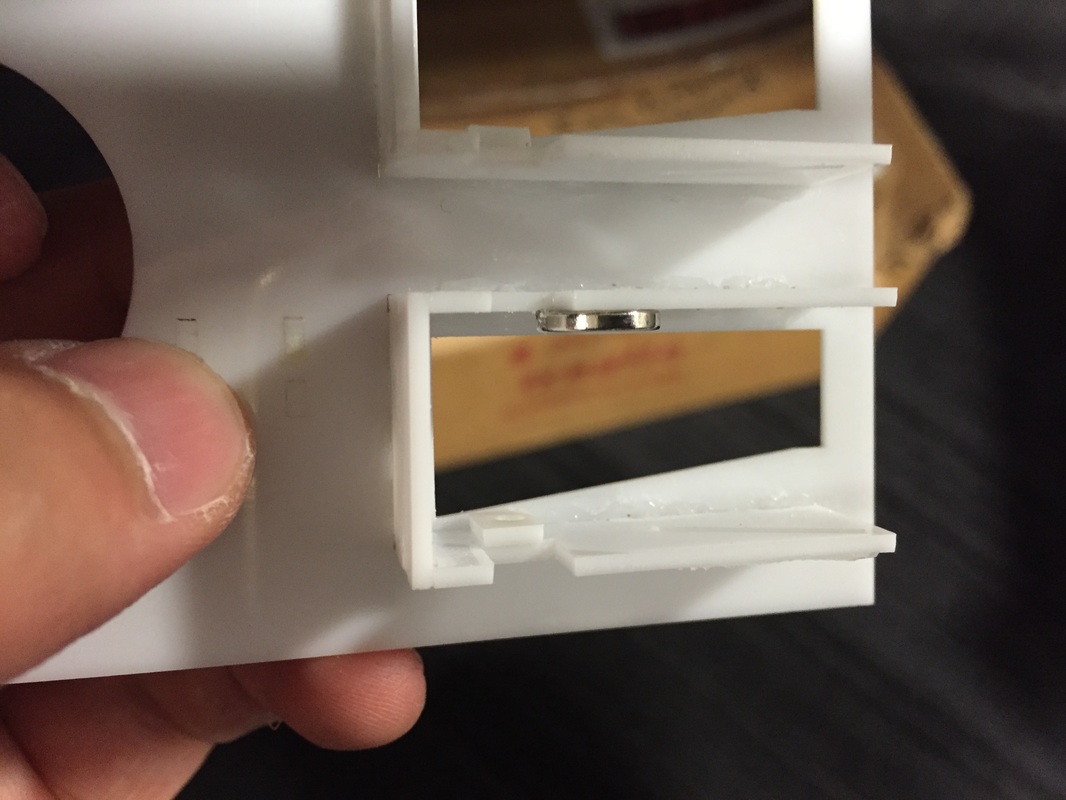
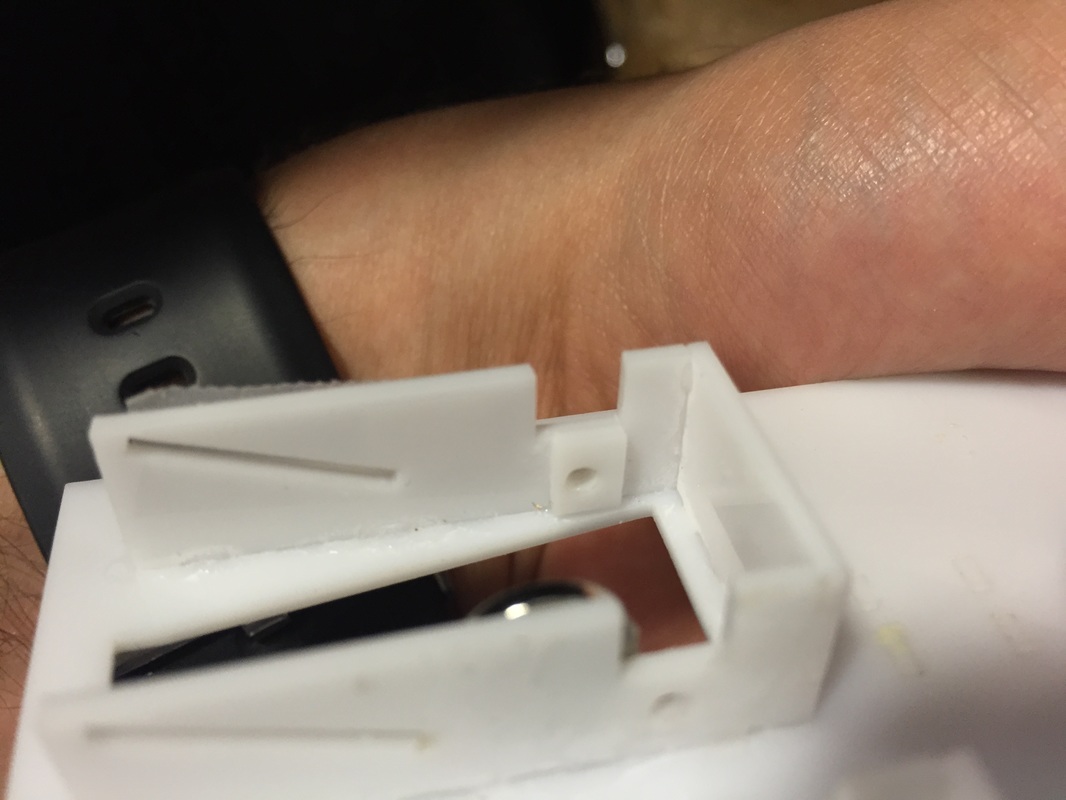
The analog stick gave me a lot of anxiety because it frequently breaks or becomes loose and its bracketing was going to be tough as it is slightly angled. As you can see in the pictures, the top dome base is slightly (6.5 degrees) inclined relative to the body and brackets.
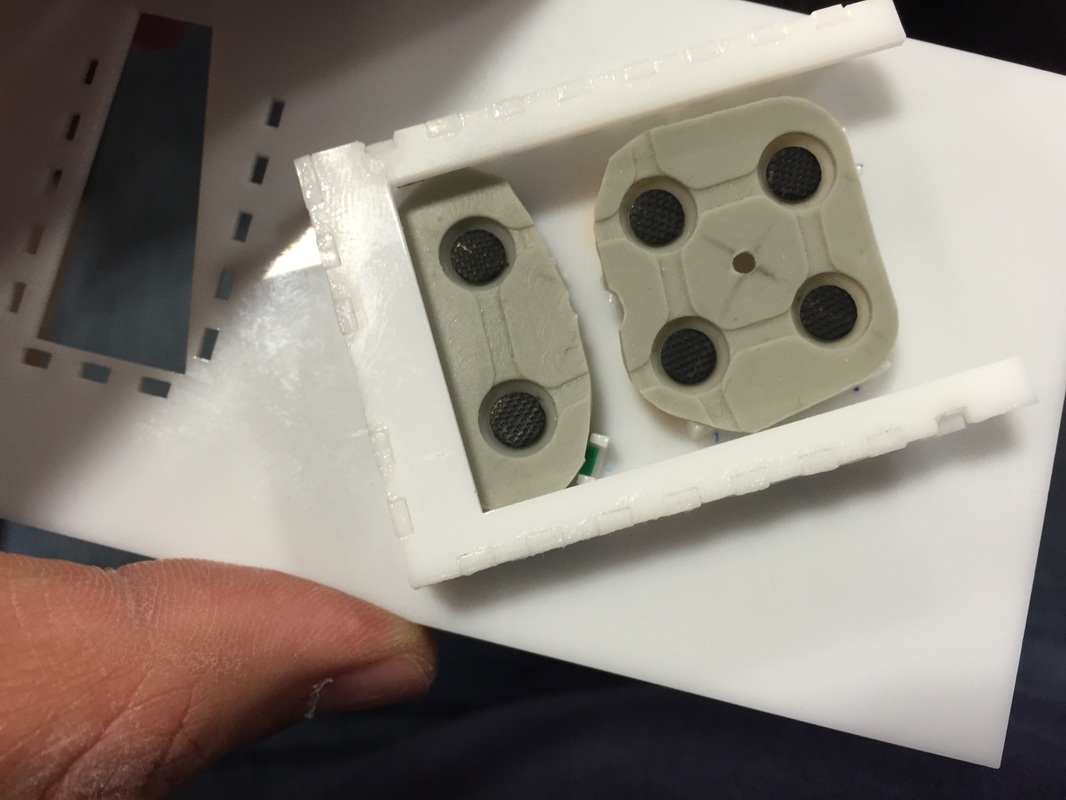
After a lot of headaches I settled on holding things with magnets. I made angled posts that came down on top of the mounting spots on the analog stick and glued the same circular magnets as before. This thing is one sturdy mofo! Gonna be tough to get it apart, which is nice because the analog stick gets pushed down and around a lot, so you want it to be strong. And if (when) the stick breaks, I can swap in a new one no problem.
The analog stick gave me a lot of anxiety because it frequently breaks or becomes loose and its bracketing was going to be tough as it is slightly angled. As you can see in the pictures, the top dome base is slightly (6.5 degrees) inclined relative to the body and brackets.
After a lot of headaches I settled on holding things with magnets. I made angled posts that came down on top of the mounting spots on the analog stick and glued the same circular magnets as before. This thing is one sturdy mofo! Gonna be tough to get it apart, which is nice because the analog stick gets pushed down and around a lot, so you want it to be strong. And if (when) the stick breaks, I can swap in a new one no problem.

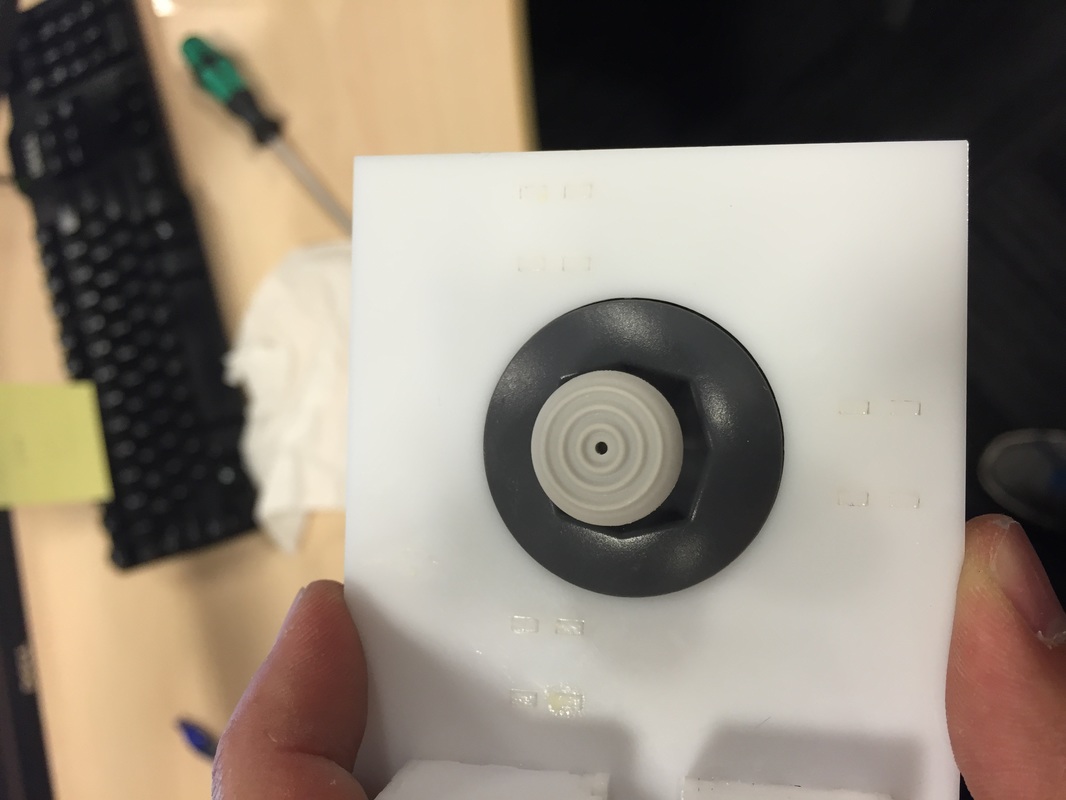
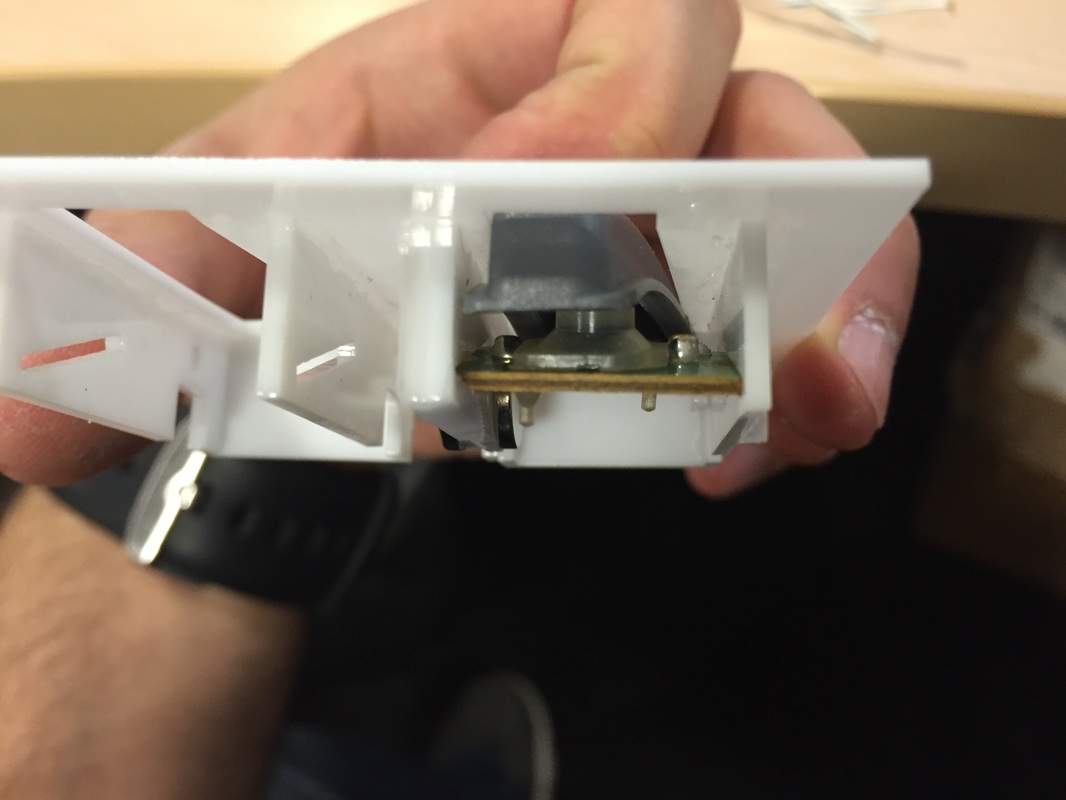
Shoulder Buttons
After figuring out the analog stick, I realized that mounting the L/Z and R buttons underneath the unit was gonna make it too thick to hold comfortably. The Analog stick alone sticks down like 28mm so an extra mounting bracket for the trigger would make the analog stick side uncomfortable to hold (especially while you have to hold down the Z button while still maneuvering the analog stick in games like mario kart). So It's gonna have to go on the top like the original shoulder buttons, the L and Z functions sharing a button of course.
My first try at a bracket for this failed, the opening wasn't big enough and the button could not be taken in and out without breaking the thing. My fix was to move the side walls apart a bit and add a little extra material to the short side of the button's pivot dwell. That things gotta be small enough to let the button be installed but big enough not to let the thing fall out.
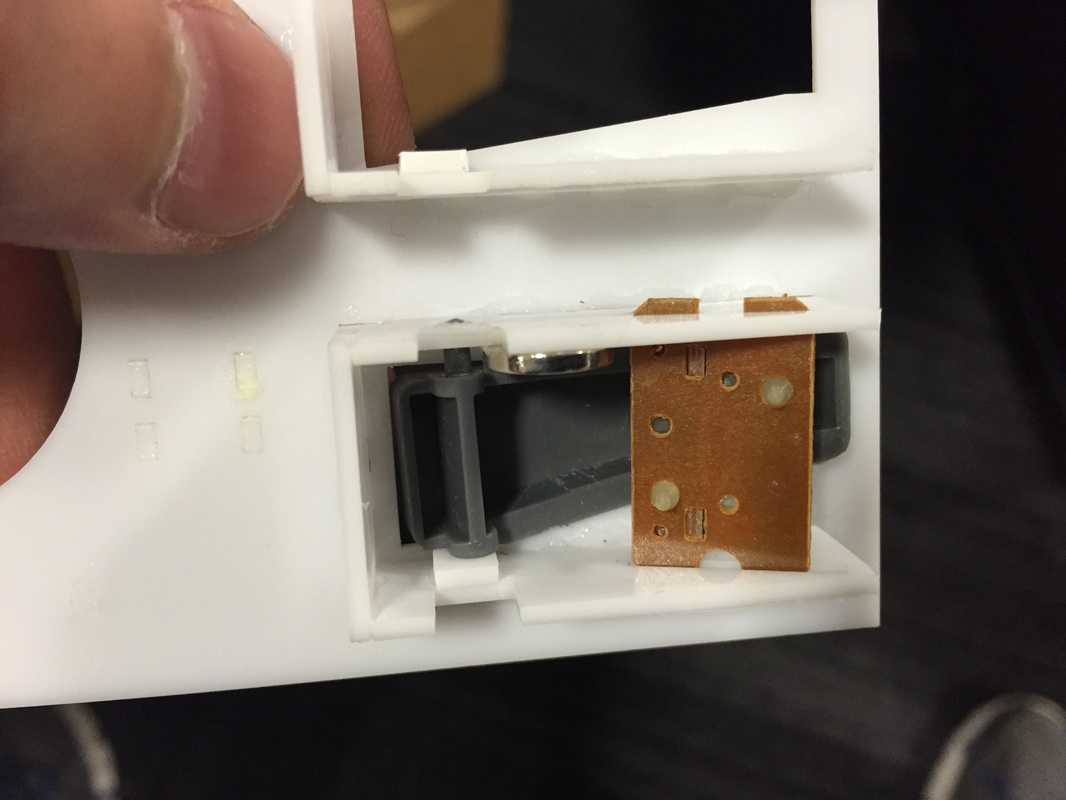
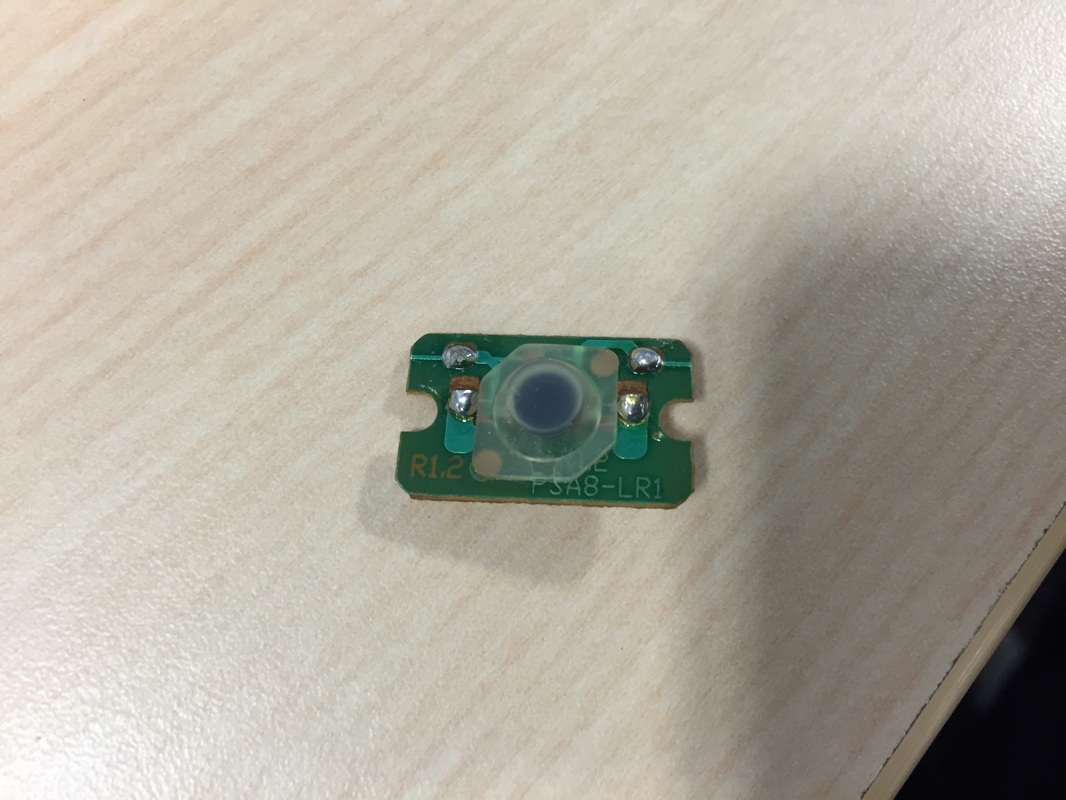
Next I focused on the circuit board with the plunger on it and how to get that held in place. I love the idea of the slots on the side but they gotta be tight so the board wont come loose and fall out. I tried two iterations of it side by side one with wide holes and the other with holes to fit the PCB exactly. The tight one was a no-go since I couldn't get the PCB in in the first place. The wide option was doable but the slits were to big and the button wouldn't stay in place. So I made a copy of the tight one, cut the dove tails off of it and stuck it to the side of the wide one with two magnets (can you tell I love magnets?). This lets me take the tight one off, position the PCB under the button in the wide slits then bring in the tight slit again and sorta lock it in place. I had to use a small piece of tape to not let the PCB move too much but it worked fine and the button pressed well.
I'm gonna try to make it better in a last (hopefully) iteration where I have one tight side and one wide side which gets tightened with the snap in piece. We'll see...
After figuring out the analog stick, I realized that mounting the L/Z and R buttons underneath the unit was gonna make it too thick to hold comfortably. The Analog stick alone sticks down like 28mm so an extra mounting bracket for the trigger would make the analog stick side uncomfortable to hold (especially while you have to hold down the Z button while still maneuvering the analog stick in games like mario kart). So It's gonna have to go on the top like the original shoulder buttons, the L and Z functions sharing a button of course.
My first try at a bracket for this failed, the opening wasn't big enough and the button could not be taken in and out without breaking the thing. My fix was to move the side walls apart a bit and add a little extra material to the short side of the button's pivot dwell. That things gotta be small enough to let the button be installed but big enough not to let the thing fall out.
Next I focused on the circuit board with the plunger on it and how to get that held in place. I love the idea of the slots on the side but they gotta be tight so the board wont come loose and fall out. I tried two iterations of it side by side one with wide holes and the other with holes to fit the PCB exactly. The tight one was a no-go since I couldn't get the PCB in in the first place. The wide option was doable but the slits were to big and the button wouldn't stay in place. So I made a copy of the tight one, cut the dove tails off of it and stuck it to the side of the wide one with two magnets (can you tell I love magnets?). This lets me take the tight one off, position the PCB under the button in the wide slits then bring in the tight slit again and sorta lock it in place. I had to use a small piece of tape to not let the PCB move too much but it worked fine and the button pressed well.
I'm gonna try to make it better in a last (hopefully) iteration where I have one tight side and one wide side which gets tightened with the snap in piece. We'll see...
Sketchup Models
Check out the google sketchup models for dimensions and details. Next step will be to design the R button bracket a bit better, make a small bracket for the start button, then make a box with all the controls jammed into one so I can see if the placement of the controls relative to the edge is comfortable or not. Stay tuned....
Check out the google sketchup models for dimensions and details. Next step will be to design the R button bracket a bit better, make a small bracket for the start button, then make a box with all the controls jammed into one so I can see if the placement of the controls relative to the edge is comfortable or not. Stay tuned....
|
| ||||
PS. All this took A LOT of planning and trial/error. Numerous times I wanted to quit or put it off until later. If you feel like that then don't give up, you're on the right track, and I hope this guide is helping.
