Tube’s Extra 50 mil
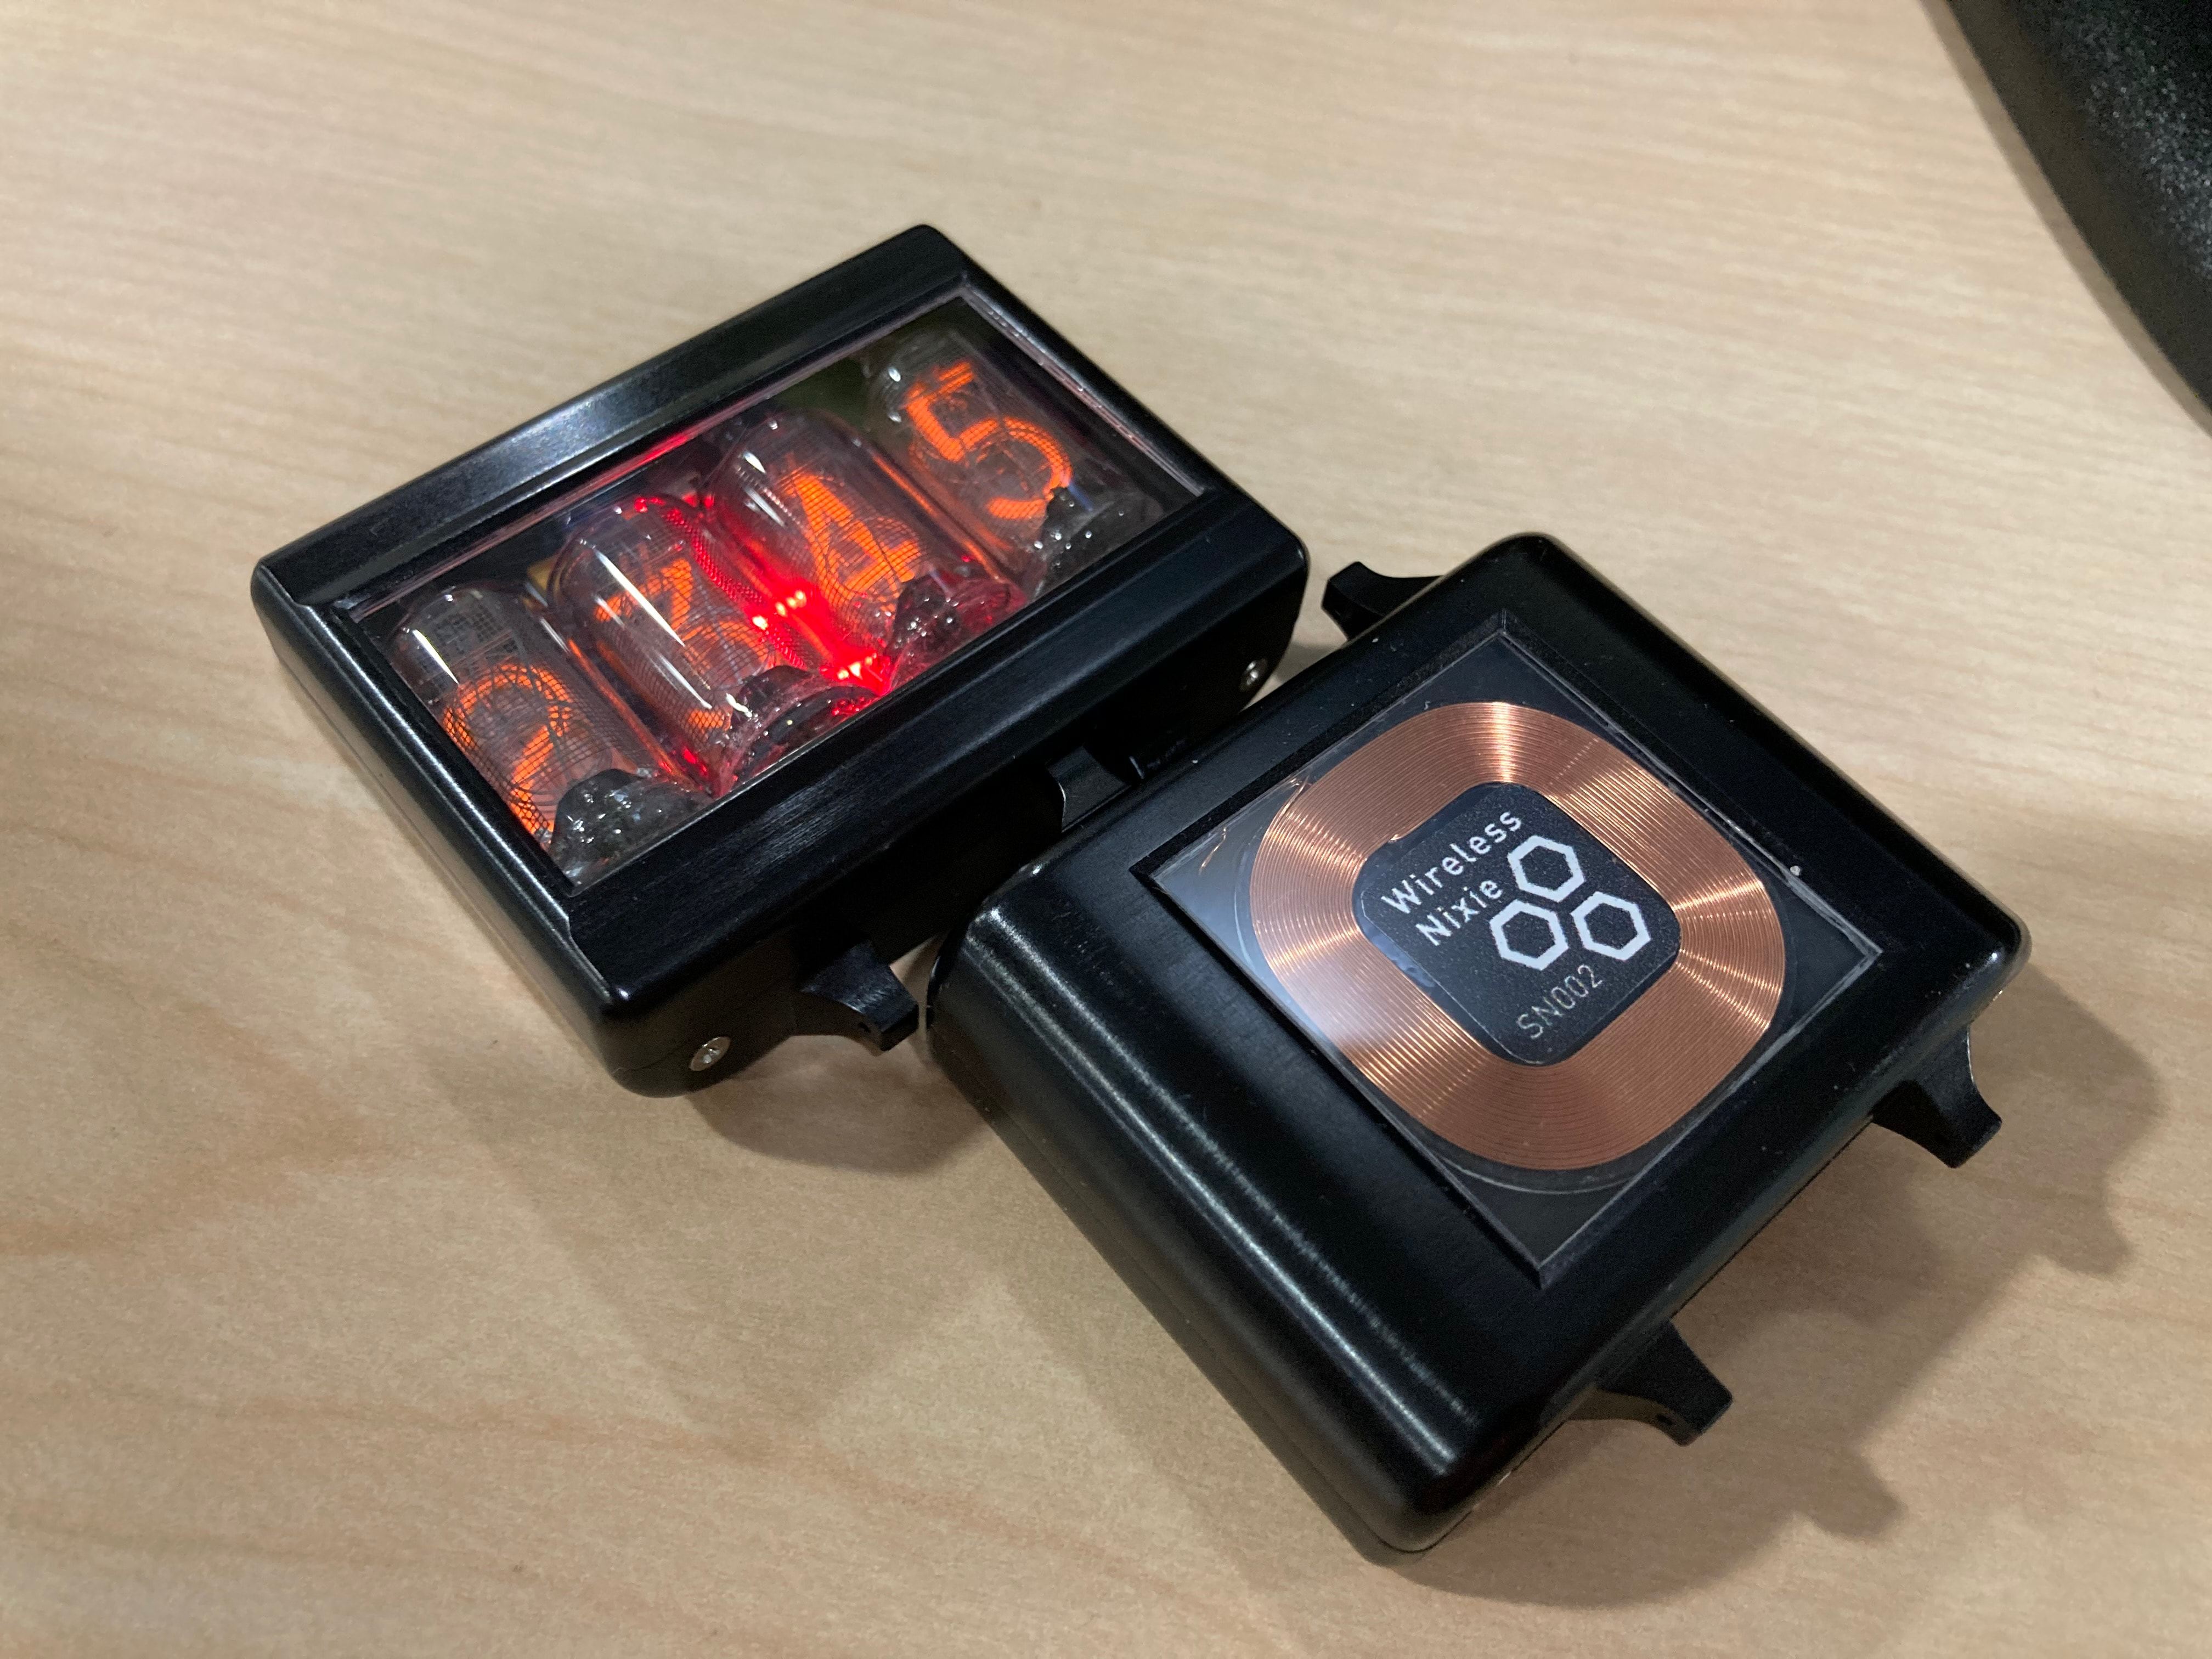
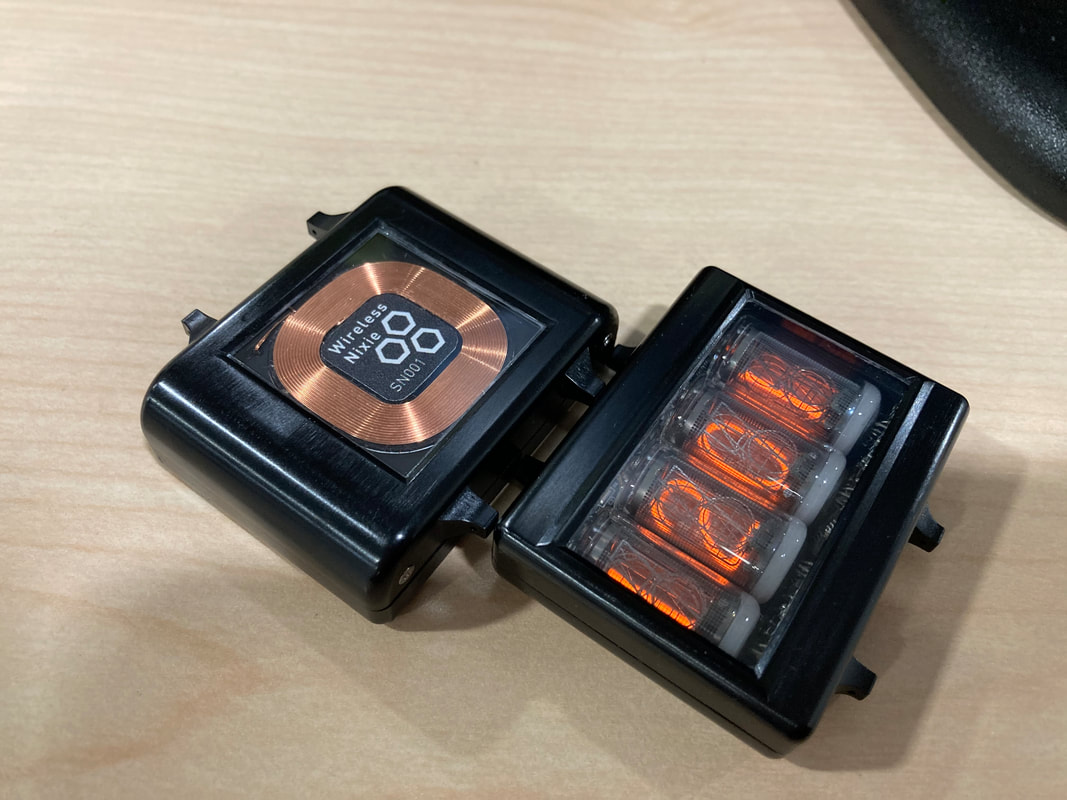
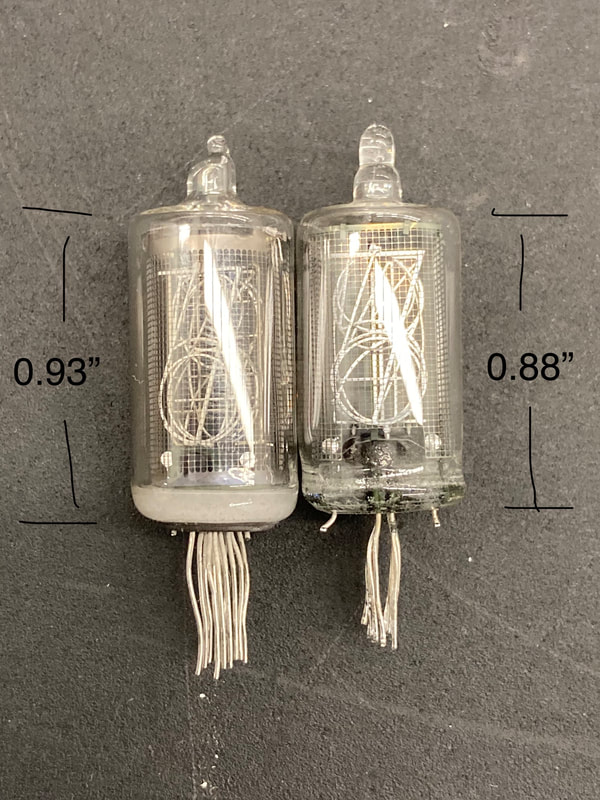
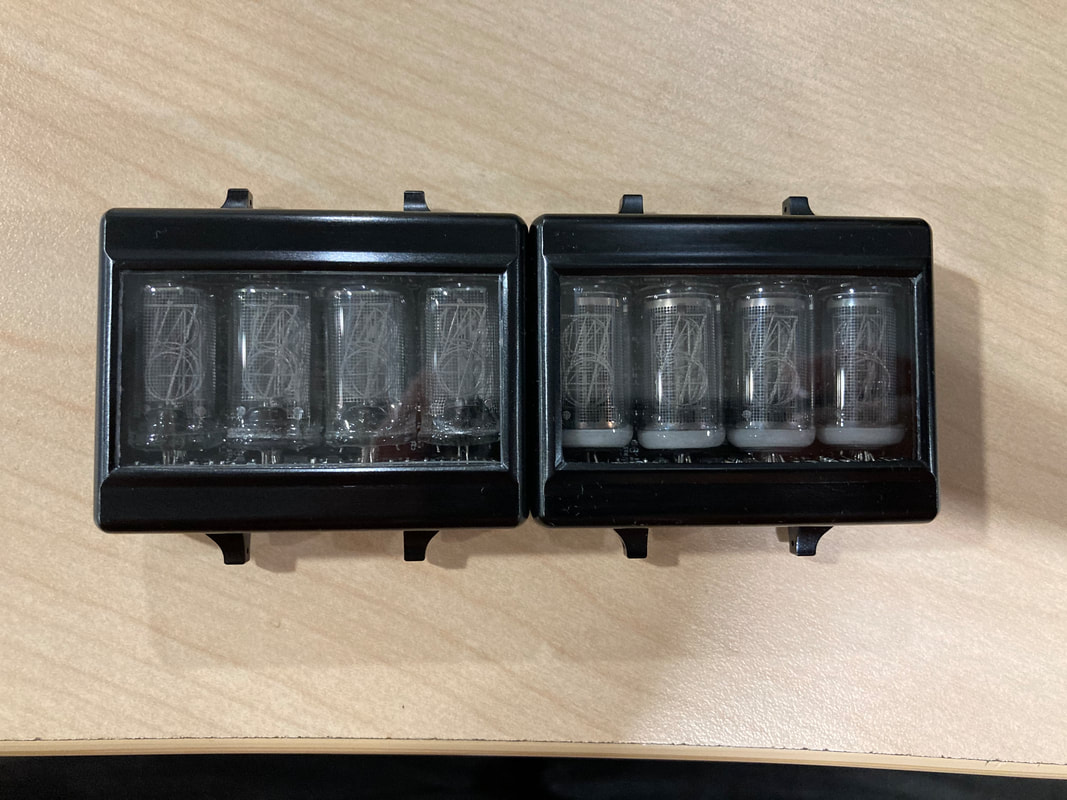
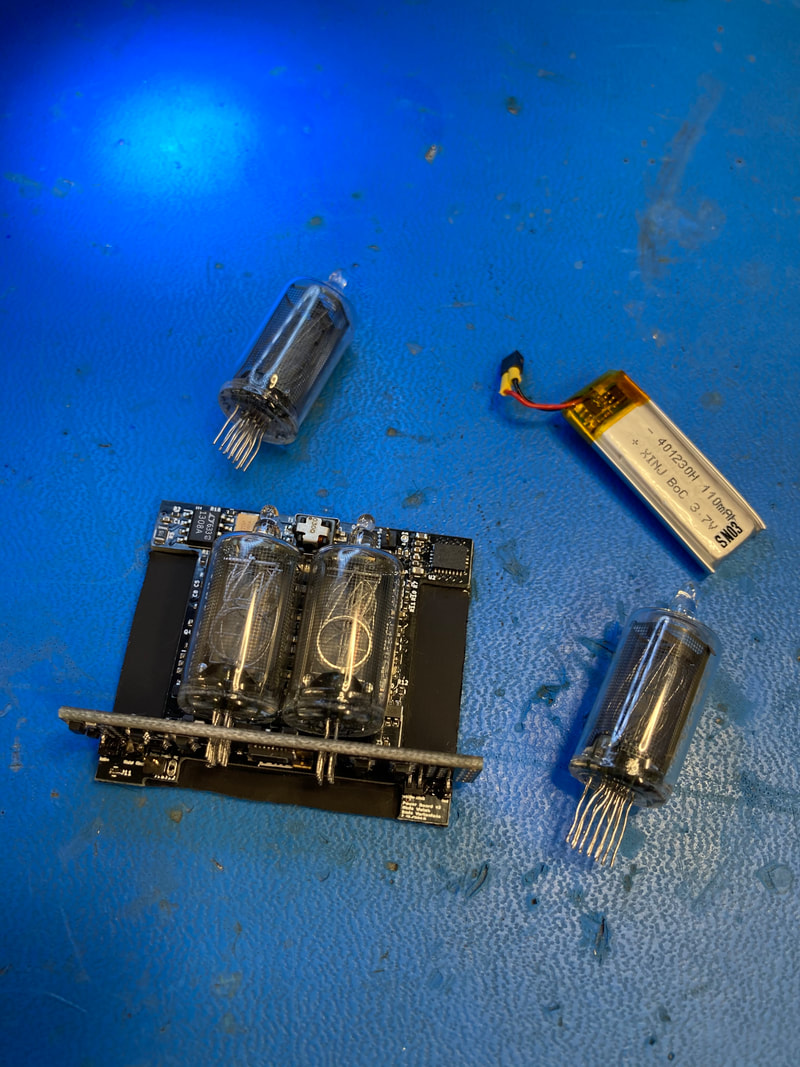
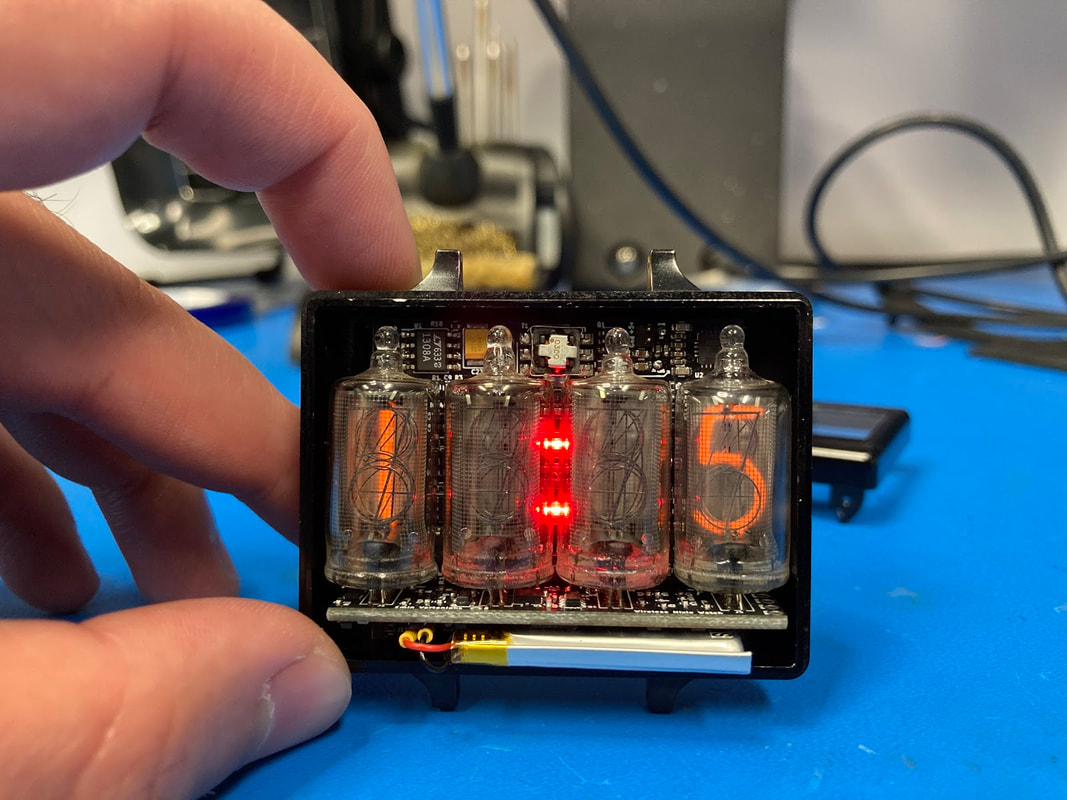
I was initially excited about the “dark” tubes I was shipped because they seem to have higher contrast when lit. You can distinguish these tubes by the frosted base at the bottom. So I figured they are easy to mix and match between the run of the mill “light” tubes. Turns out that the dark tubes are 50 mil taller than the light tubes which means they really put stresses on the logic board when fully pushed in. I ended up only putting one watch together that has these dark tubes and am ultimately glad that I only bought like 10 of this kind but I’ll ship this watch as-is and just note that it’s susceptible to breakage. The first 6 of these watches being sold are to friends and coworkers anyways so I can fix or replace them easier.
I was initially excited about the “dark” tubes I was shipped because they seem to have higher contrast when lit. You can distinguish these tubes by the frosted base at the bottom. So I figured they are easy to mix and match between the run of the mill “light” tubes. Turns out that the dark tubes are 50 mil taller than the light tubes which means they really put stresses on the logic board when fully pushed in. I ended up only putting one watch together that has these dark tubes and am ultimately glad that I only bought like 10 of this kind but I’ll ship this watch as-is and just note that it’s susceptible to breakage. The first 6 of these watches being sold are to friends and coworkers anyways so I can fix or replace them easier.

Building Watches
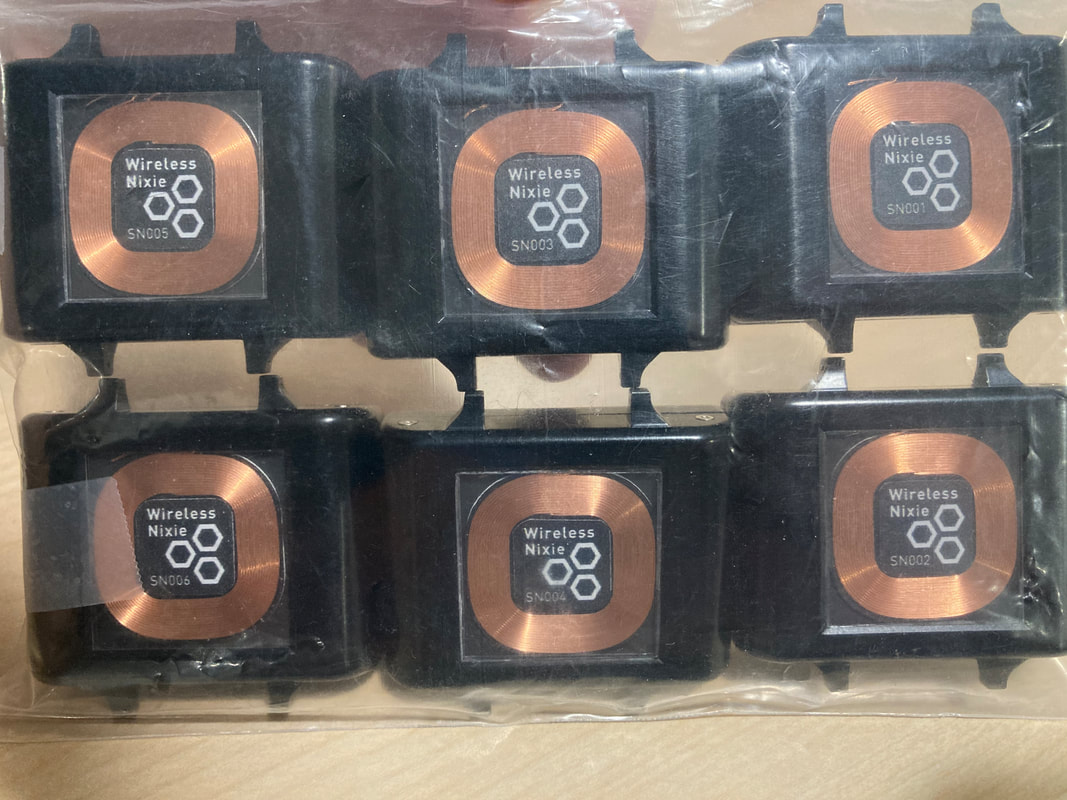
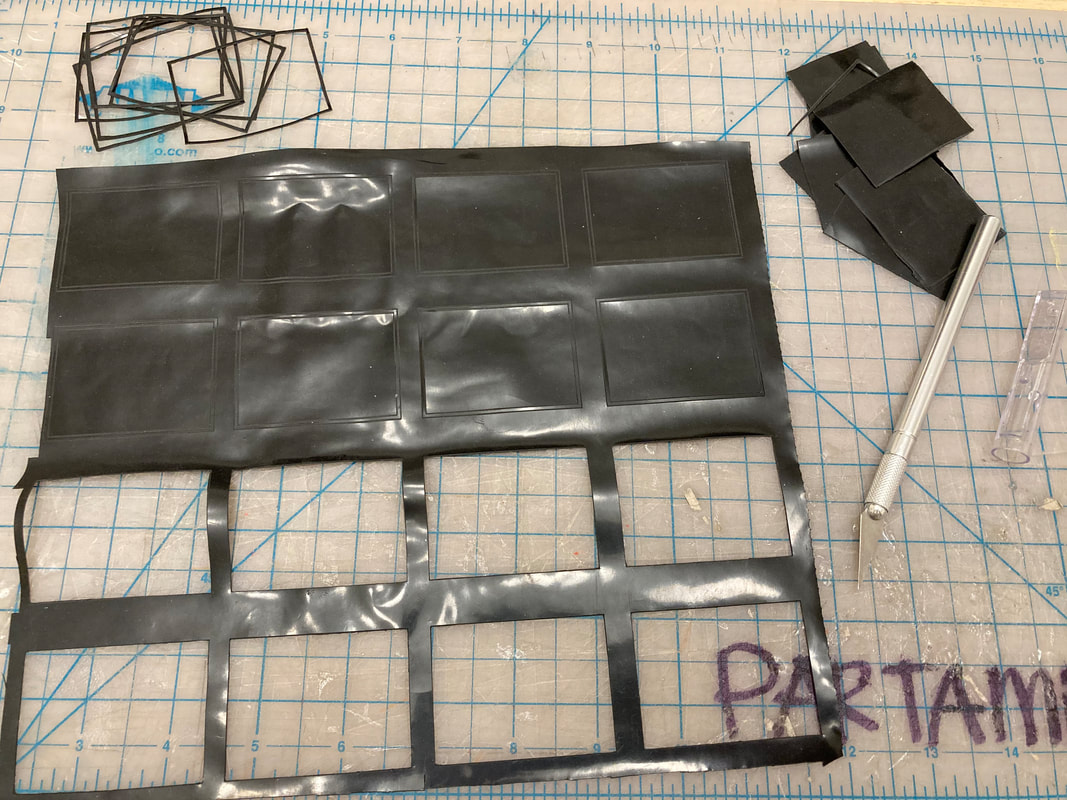
I was genuinely surprised at how much work it took to put one watch together. Even after building up the kits and batch processing some initial steps the final assembly of the watch takes 1.5-2 hours. I’d say once all the engineering and debugging was done, the total time to build each watch was 6-8 hours. That’s stuff like cutting gaskets (laser cut then hand finished), filing the case down, gluing the acrylic, testing PCB’s, tubes, batteries, etc. I’ve already made notes of what to change about the design to make it more manufacturable (DFM) but I’m not sure I’ll be making too many more. I have kits for another batch of 6 that I’ll sell to the general public but I need a break so it won’t be for another few months I bet....
I was genuinely surprised at how much work it took to put one watch together. Even after building up the kits and batch processing some initial steps the final assembly of the watch takes 1.5-2 hours. I’d say once all the engineering and debugging was done, the total time to build each watch was 6-8 hours. That’s stuff like cutting gaskets (laser cut then hand finished), filing the case down, gluing the acrylic, testing PCB’s, tubes, batteries, etc. I’ve already made notes of what to change about the design to make it more manufacturable (DFM) but I’m not sure I’ll be making too many more. I have kits for another batch of 6 that I’ll sell to the general public but I need a break so it won’t be for another few months I bet....

| Box I was a little stressed about the packaging of the product because, as my wife will attest to, I suck at gift wrapping. But luckily I got her help, picked out a nice box that fits the charging pad, USB cable, and watch band. We even got a shadow box foam portion to hold the watch so I’m super excited about delivering these to customers and having them be wow’d when they open the box. | 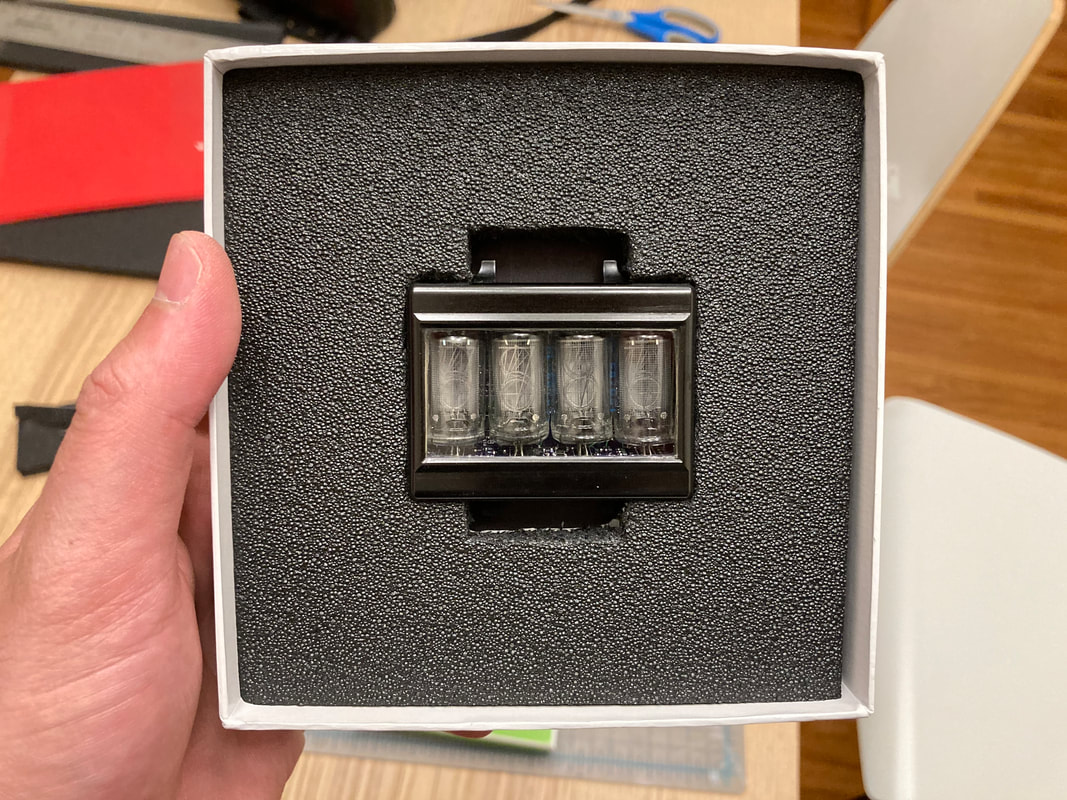 |
Angles problem
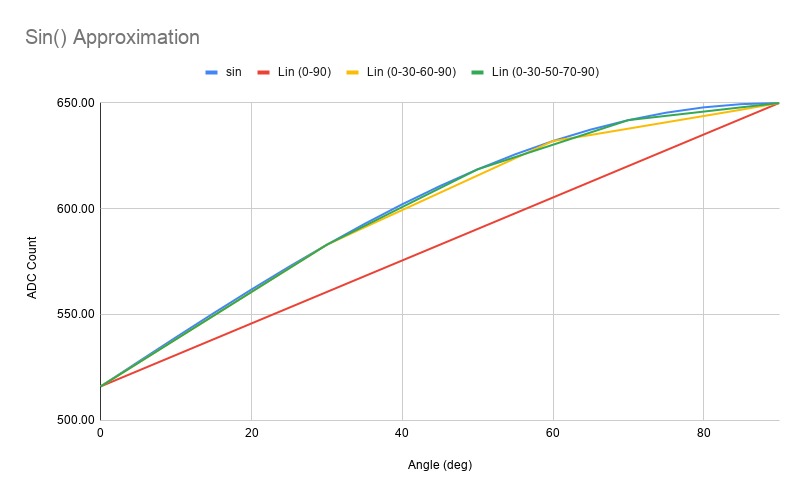
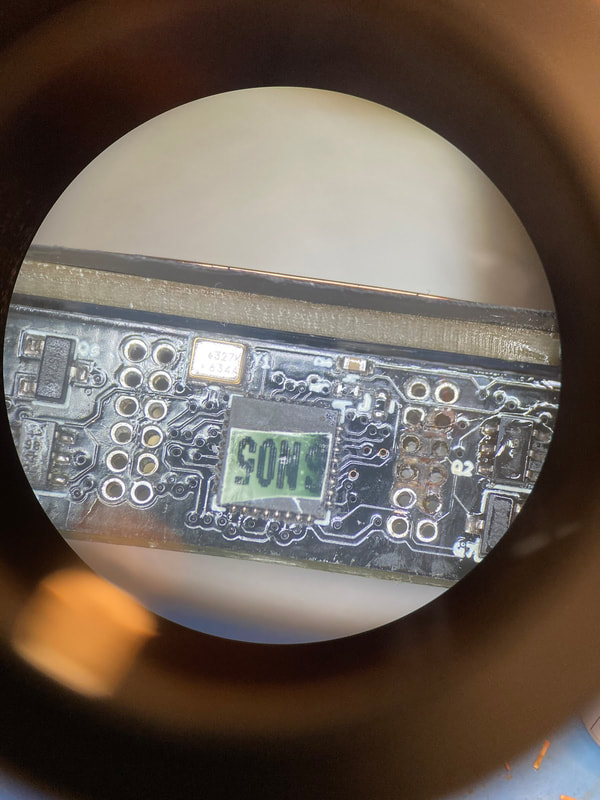
I only found out about this problem after building 4 or 5 of these watches. So the gain on the accelerometers has a wide range which means “vertical” and “horizontal” is sensed differently from watch to watch. I found this out after assembling a watch that seemed to be spitting out angles just fine but then wouldn’t go into menu mode because it wasn’t seeing the readings from the accel that I had hard coded based on the average datasheet numbers. This got me to realize that I had been doing angles all wrong in code. Usually when things that sense their own orientation in space deal with accelerometer readings they do matrix math and linear algebra to figure out where they are pointed but with a tiny microcontroller running at 1Mhz I don’t have the luxury of calculating geometries. So I opted to do 2 things. 1) I load special code onto the watch after it has been fully assembled which just shows me ADC counts from the accelerometers This way I can tune the gain and offset that each watch’s accel has. 2) I broke apart the sin() curve into 3 parts and approximated each section with its own linear equation based on the offset and gains. Lastly, I combined these into coefficients for each watch which are #defined at build time and loaded onto the watch. So far, all watches behave correctly! But it’s cumbersome, will need to fix this somehow if I ever do another version.
I only found out about this problem after building 4 or 5 of these watches. So the gain on the accelerometers has a wide range which means “vertical” and “horizontal” is sensed differently from watch to watch. I found this out after assembling a watch that seemed to be spitting out angles just fine but then wouldn’t go into menu mode because it wasn’t seeing the readings from the accel that I had hard coded based on the average datasheet numbers. This got me to realize that I had been doing angles all wrong in code. Usually when things that sense their own orientation in space deal with accelerometer readings they do matrix math and linear algebra to figure out where they are pointed but with a tiny microcontroller running at 1Mhz I don’t have the luxury of calculating geometries. So I opted to do 2 things. 1) I load special code onto the watch after it has been fully assembled which just shows me ADC counts from the accelerometers This way I can tune the gain and offset that each watch’s accel has. 2) I broke apart the sin() curve into 3 parts and approximated each section with its own linear equation based on the offset and gains. Lastly, I combined these into coefficients for each watch which are #defined at build time and loaded onto the watch. So far, all watches behave correctly! But it’s cumbersome, will need to fix this somehow if I ever do another version.
Bad tube and botch job
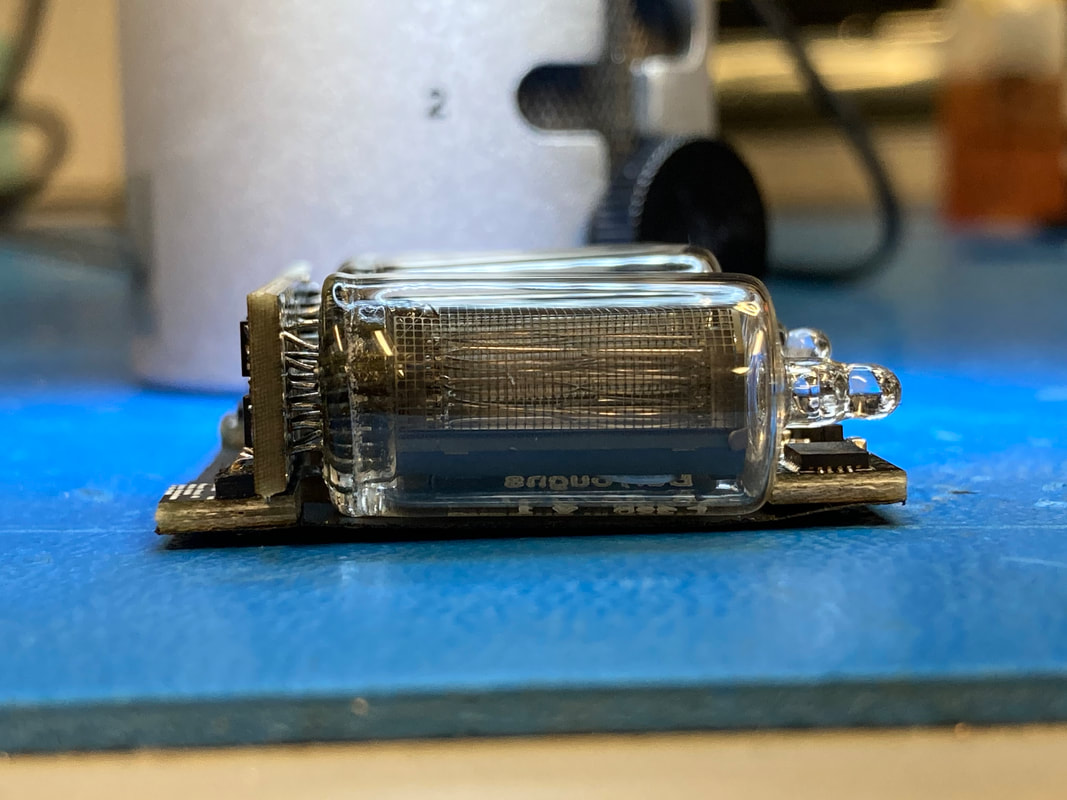
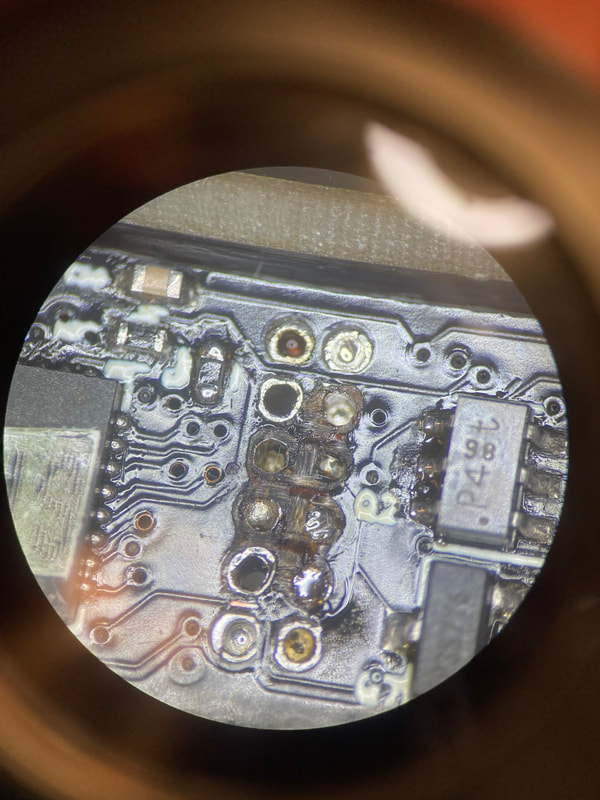
I had made sure that every numeral of every tube works before I went forward with my assemblies by inserting the tubes into my development watch which has headers for the tubes. Then I fired up the watch and used the slomo camera on my phone to record each number that got illuminated. What I didn’t realize is that some of the tubes are a little flaky and will work once just fine but might not work consistently the 2nd or 3rd time. I ran into this on a watch where I completely built it up and had tubes 2 and 3 not light up about 50% of the time. This led me to do the first set of tube reworks on this design and boy was it messy! Getting the tube out is hard because it’s got 10 through holes holding it down. The trick with this kind of desoldering job is to actually flow hot solder across all the pins at once and try to pull out the tube. You end up using more solder to just hold onto the heat and keep the through holes molten long enough for you to pull it out. It was extra messy because I damaged the PCB’s plated holes and solder mask when I heated the pins for so long. Luckily there are no traces or planes on the underside of the board right underneath the tubes so it only looks bad but still works… need a more manufacturable solution!
I had made sure that every numeral of every tube works before I went forward with my assemblies by inserting the tubes into my development watch which has headers for the tubes. Then I fired up the watch and used the slomo camera on my phone to record each number that got illuminated. What I didn’t realize is that some of the tubes are a little flaky and will work once just fine but might not work consistently the 2nd or 3rd time. I ran into this on a watch where I completely built it up and had tubes 2 and 3 not light up about 50% of the time. This led me to do the first set of tube reworks on this design and boy was it messy! Getting the tube out is hard because it’s got 10 through holes holding it down. The trick with this kind of desoldering job is to actually flow hot solder across all the pins at once and try to pull out the tube. You end up using more solder to just hold onto the heat and keep the through holes molten long enough for you to pull it out. It was extra messy because I damaged the PCB’s plated holes and solder mask when I heated the pins for so long. Luckily there are no traces or planes on the underside of the board right underneath the tubes so it only looks bad but still works… need a more manufacturable solution!
Next Steps:
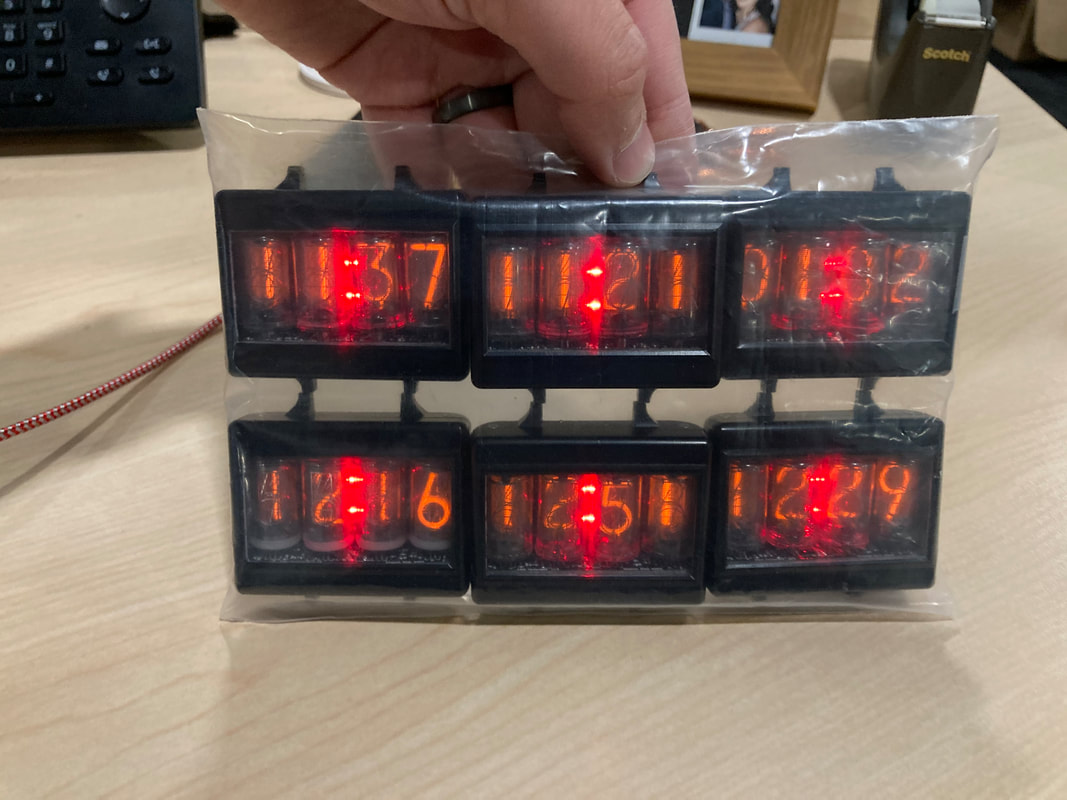
I’ve finished all 6 watches now, they’ll be going through final code integration soon. After that all I gotta do is make an instructional video showing how the watch works which will be exciting! I’m not one for making youtube “content” but I know seeing a video of how something works goes a long way toward understanding it versus just reading an instructional diagram or something. I’ll have an instructional comic with it, just because I feel like if people forget how to do something I don’t want them looking for a youtube clip… but yeah, both those instructional pieces are the last big things before I can ship out this first batch of 6 Wireless Nixie Watches. See you soon!
I’ve finished all 6 watches now, they’ll be going through final code integration soon. After that all I gotta do is make an instructional video showing how the watch works which will be exciting! I’m not one for making youtube “content” but I know seeing a video of how something works goes a long way toward understanding it versus just reading an instructional diagram or something. I’ll have an instructional comic with it, just because I feel like if people forget how to do something I don’t want them looking for a youtube clip… but yeah, both those instructional pieces are the last big things before I can ship out this first batch of 6 Wireless Nixie Watches. See you soon!